Author: zeeshan@advantage-services.com

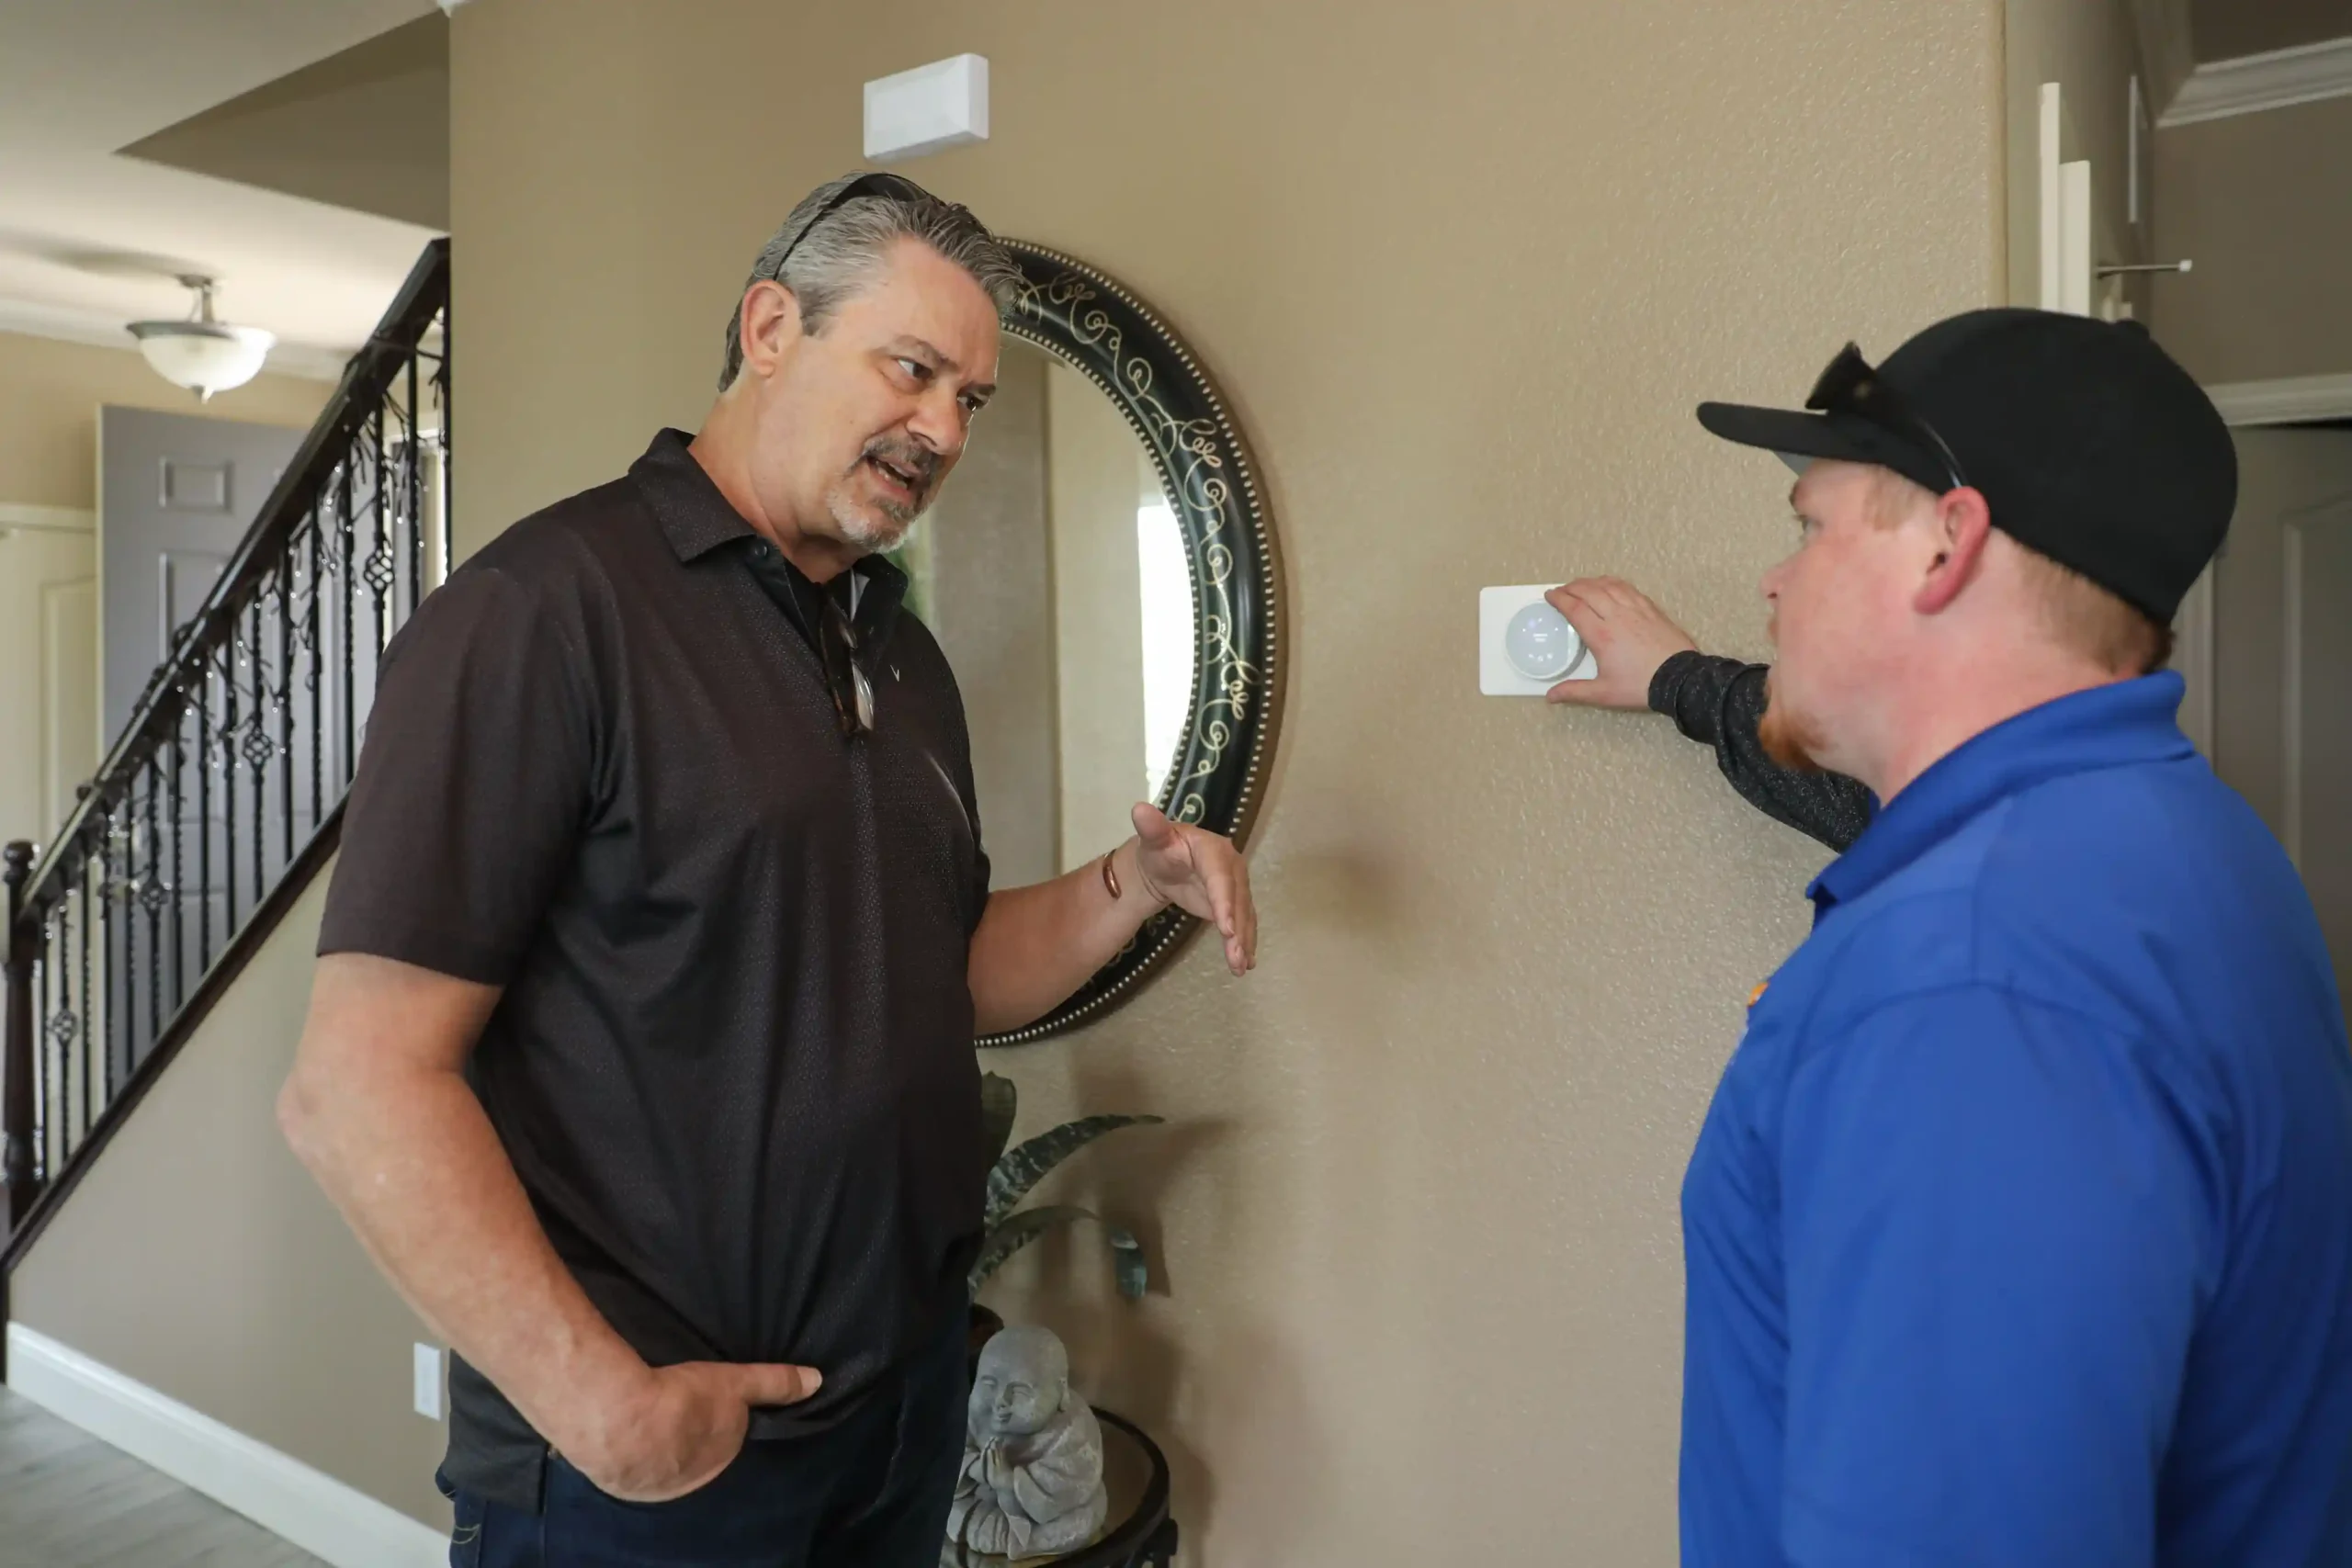
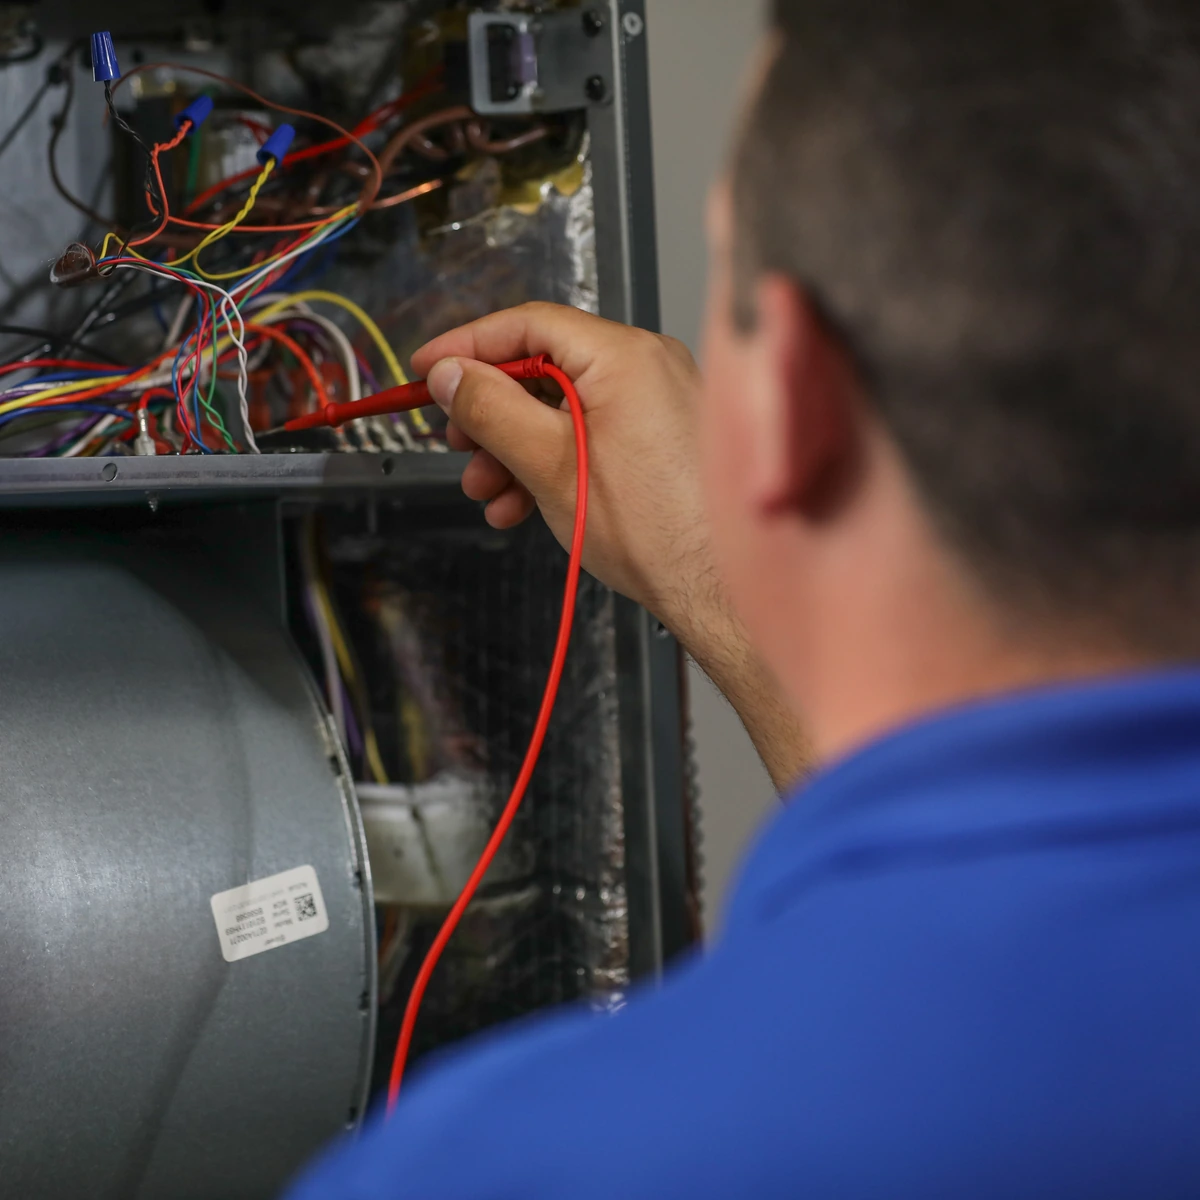
Fox Family Heating & Air Conditioning technician helping a homeowner adjust a wall-mounted smart thermostat.

When Not to Run a Whole-House Fan: Wildfire Smoke, Pollen, and Poor Outdoor Air

A whole-house fan is designed to pull in outdoor air through your open windows. At the same time, indoor air is exhausted through the attic. While this is helpful when the outdoor air is cool and clean, it isn’t as safe when the air is polluted by wildfire smoke, high pollen counts, smog, and dust on days with a high air quality index (AQI).

By working with Fox Family Heating & Air Conditioning, you can learn when whole-house fans are effective tools and when it is better to leave it turned off.

Why Outdoor Air Quality Matters With Whole-House Fans

A whole-house fan is not intended to filter incoming outdoor air, which is why outdoor air quality matters so much. If you’re running a whole-house fan during bad AQI days, you could end up pulling pollutants directly into your living spaces. Because you also have to keep your windows open when the whole-house fan is operating, it can lead to more pollutants in your home.

In comparison, heating, ventilation, and air conditioning (HVAC) systems can be set to recirculation mode. This allows the indoor air to be recirculated through the HVAC filters without intentionally pulling any outdoor air into the home. 

Do Not Run a Whole-House Fan During Wildfire Smoke

A whole-house fan should not be run during wildfire smoke because of the health risks involved. Instead, there are alternative things you can do to keep your family comfortable.

Why Smoke Is a Serious Indoor Air Risk

Wildfire smoke contains fine particles, including PM2.5 particles. When these pollutants are present, they can irritate your eyes, throat, and lungs. Unfortunately, wildfire smoke is especially hazardous for people who have asthma and respiratory issues. Because of how small the particles are, they can easily enter through vents, windows, cracks, and ventilation systems.

What To Do Instead

To protect your family’s comfort and health, use the following tips when wildfire smoke is present outside.

  • Shut your windows and doors.
  • Turn off the whole-house fan to keep outdoor air from being pulled inside.
  • Set your fan to “On” or “Circulate” mode if your system has those options.
  • Use a high-efficiency filter, such as MERV 13, if your HVAC system is designed to accommodate it.
  • Turn on a portable HEPA purifier in your bedrooms or living room.

Avoid Running It on High-Pollen Days

We also generally recommend shutting your whole-house fan off on high-pollen days, especially if some of your family members suffer from allergies.

How Whole-House Fans Pull Allergens Indoors

To operate a whole-house fan, you must leave one or more windows open. This allows pollen to enter, and the fan can draw pollen throughout the home. As a result, whole-house fans can worsen asthma symptoms, allergies, sinus irritation, and indoor dust buildup.

Better Options During Allergy Season

Rather than use your whole-house fan during allergy season, we recommend the following alternatives.

  • Always check your local pollen levels before you open any windows.
  • During times with high pollen counts, keep your windows closed.
  • Use HVAC filtration and portable air cleaners to filter out pollen.
  • Replace your HVAC filter more frequently during heavy allergy seasons.

Skip Whole-House Fan Use During Smog, Dust, or Poor AQI

AQI is basically a system that measures and reports the levels of five different pollutants in the air. It is presented as a figure between 0 and 500 for your area, with 0 being the best air quality and 500 representing the highest pollution level.

When your air quality is smoky, dusty, visibly hazy, or otherwise unhealthy, you should avoid using the whole-house fan. Local conditions, such as construction dust, industrial odors, road traffic, chemical smells, and agricultural activity, can make your air quality worse than what the nearest AQI monitoring station reports. To protect your indoor air quality (IAQ), it’s a good idea to always check AirNow or a local weather app before you run the fan.

Whole-House Fan vs. HVAC Fan: Know the Difference

A whole-house fan is responsible for bringing outdoor air into your home. In comparison, the “HVAC fan/circulate” mode on your HVAC system is only moving indoor air through your filter. When outdoor air quality is poor, HVAC circulation is generally the safer option.

You can improve your IAQ by using a MERV filter that has a higher rating. However, you should check the manufacturer’s instructions for your unit to verify that it is compatible with higher ratings.

How To Decide If It Is Safe to Run Your Whole-House Fan

To determine if a whole-house fan is a good option right now, you can use the following checklist.

  • Is the outdoor AQI at an unhealthy level or higher (above 100)?
  • Is there any wildfire smoke, ash, or smoke odors present outside?
  • Are pollen counts high?
  • Is the air temperature warmer outside than it is inside?
  • Is it unsafe to open your windows?
  • Is there dust, exhaust, construction, or chemical odors present nearby?

If you answered yes to any of the previous questions, you should leave the whole-house fan off.

What To Do After Accidentally Running It During Bad Air

Sometimes, you may run your whole-house fan without realizing that the air quality was bad. When this happens, the following steps can help you alleviate IAQ issues.

  • Turn your fan off.
  • Close all of your home’s windows and doors.
  • If it is an option, set your HVAC fan to recirculation mode.
  • Turn on your portable HEPA air cleaners.
  • Clean any settled dust in the room with a damp cloth.
  • If smoke odors and poor airflow are recurring problems, schedule a professional HVAC inspection.

When You Can Use a Whole-House Fan Again

You can switch back to using your whole-house fan again if all of the following statements are true.

  • The outdoor air quality has improved.
  • Your area’s AQI is at an acceptable level.
  • You no longer smell any smoke or ash odors.
  • The visible haze is gone.
  • Pollen levels are manageable.
  • The outdoor temperature is cooler than the indoor temperature.

FAQs

Can I run a whole-house fan if I use an air purifier?

In general, you shouldn’t run the whole-house fan and air purifier at once. If the outdoor air quality is poor enough to require an air purifier, the whole-house fan should be shut off. Otherwise, the fan could bring in pollutants faster than the purifier can remove them.

Is a whole-house fan the same as air conditioning?

No, it is not. Whole-house fans ventilate using outdoor air. In comparison, ACs normally recirculate indoor air as they cool.

Should I run my HVAC fan during wildfire smoke?

Often, this is the best option. You should use a clean, appropriate filter for your HVAC system and set the system to recirculate indoor air.

What filter is best for wildfire smoke?

MERV 13 is generally the recommended option, but this is only if your HVAC system is able to handle it.

Should I open windows when outdoor air quality is bad?

No, you shouldn’t open windows and doors during bad AQI days because this allows wildfire smoke, pollen, and other pollutants to get inside your home.

Optimize Your IAQ

Whole-house fans are effective when the outdoor air is cool and clean. Because they ventilate using outdoor air, they aren’t ideal if there is smoke, pollen, dust, or other air quality issues present. On these days, setting the HVAC system to recirculate your indoor air, using a portable HEPA purifier, and closing your windows can help maintain your IAQ.

Need help finding the right IAQ equipment and filtration setup? Schedule an HVAC and indoor air quality inspection before smoke or allergy season.

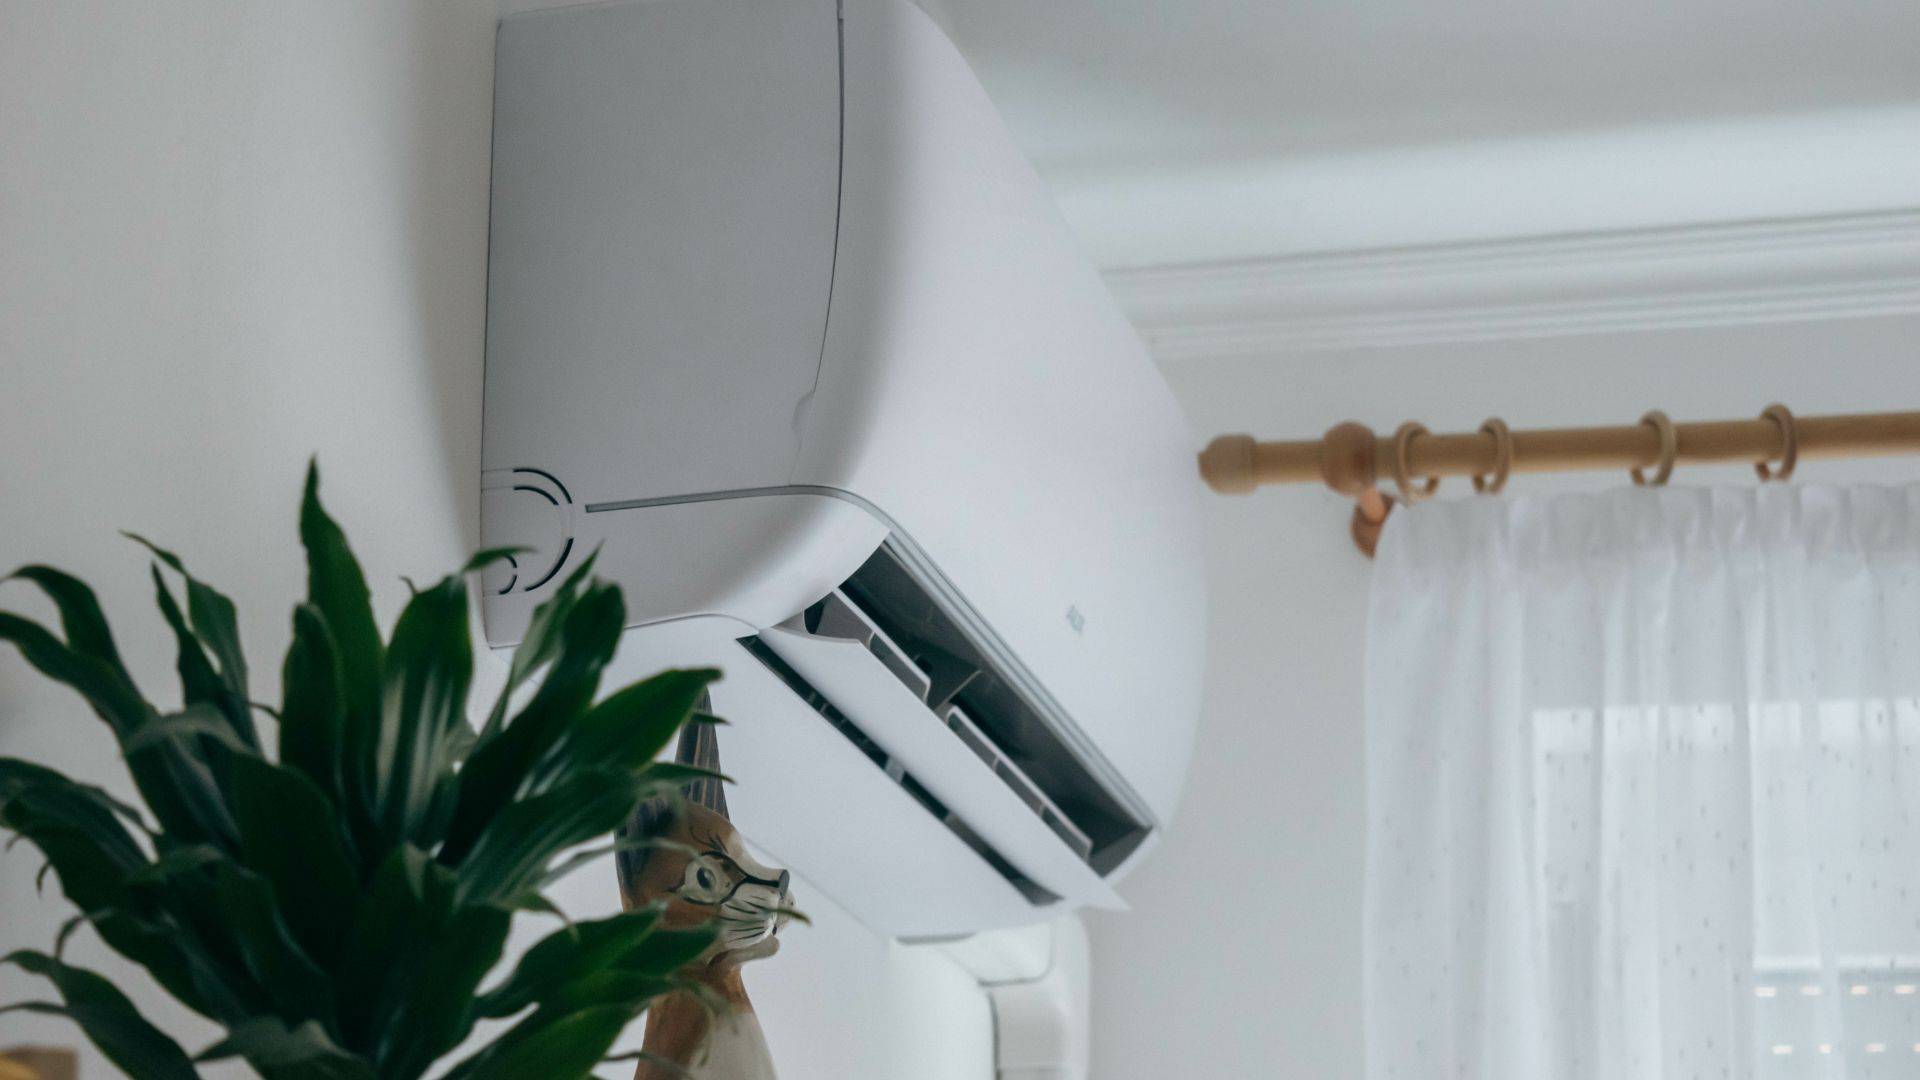
Image of a ductless mini-split air conditioner mounted on the wall

Where Should a Mini Split Indoor Unit Be Installed

Mini-split units are a popular choice in Sacramento homes because of their flexibility. They don’t require ductwork, which makes them ideal for preexisting homes. 

For these energy-efficient units to work properly, they need to be placed in the right location. When Fox Family Heating & Air comes out to install your mini-split unit, we’ll carefully review your airflow, room layout, drainage needs, heat sources, sunlight, ceiling height, and maintenance access to determine the best placement.

Why Mini-Split Indoor Unit Placement Matters

When the unit is poorly placed, it can result in uneven temperatures, weak airflow, short cycling, and higher energy bills. Basically, a poor location means your unit has to work harder to achieve the same temperature.

By selecting the right location, we can also ensure the temperature sensor reads the room temperature accurately. For example, a drafty location or a patch of sunlight can cause a reading that is different from the rest of the room. As an added benefit, choosing the right spot makes future filter cleaning and service easier.

The Best Place To Install a Mini-Split Indoor Unit

For your comfort and convenience, we use the following guidelines to install mini-split units.

  • High on the Wall: The unit should be placed about 6 to 8 feet off the floor on a vertical wall.
  • Central Location: For proper airflow and even temperatures, we try to install the unit in a central part of the room whenever possible.
  • Airflow Optimization: No matter where the unit is installed, our goal is to place it in a location where air can move freely across the space.
  • Exterior Walls: As long as it is practical, we will install the unit on an exterior or perimeter wall. This makes it easier to set up electrical connections, line set, and condensate drainage.
  • High-Use Rooms: The best location is in a space where you and your family spend most of your time. For example, bedrooms, living rooms, offices, additions, and converted spaces are popular locations.

Keep the Unit Away From Obstructions

For the best airflow and comfort, it’s important to keep the unit away from anything that could obstruct or block it.

Avoid Furniture, Curtains, and Shelving

The unit should never be installed behind tall furniture, curtains, shelving, or wall decor. If the airflow is blocked, it can create hot and cold spots in the room. Instead, there should be proper clearance around the top, sides, and front of the unit.

Avoid Tight Corners

Corners can limit the distribution of air. Because of this, we generally recommend placing the unit in a central location on the wall and not in a tucked-away spot.

Avoid Heat Sources and Direct Sunlight

You should never install the unit above heat sources. Ovens, televisions, computers, and strong lighting can cause the temperature sensor to have an inaccurate reading, leading to inefficient indoor temperatures. The unit should not be in a location that receives direct sunlight for extended periods of time.

Do Not Aim Airflow Directly at People

Similarly, the mini-split unit should be set up so that it doesn’t blow air directly onto a bed, sofa, desk, dining table, or crib. For bedrooms, this means the airflow should be aimed at a walkway instead of the bed. Meanwhile, airflow in the living room should not be focused on seating areas. Finally, avoid aiming the airflow at the table in your kitchen or dining room.

Should a Mini-Split Go in a Hallway?

Hallways are not ideal for mini-split placement because the conditioned air may not reach adjacent rooms evenly. Additionally, the unit will read the hallway temperature instead of the room where your family is actually located. Instead of a hallway placement, we recommend putting units in the rooms where people spend the most time.

What About Large Rooms or Open Floor Plans?

If you have a large room or open floor plan, the unit’s location should be chosen so that it serves the whole area. You’ll need to consider the shape of the room, furniture layout, ceiling height, and sunlight exposure. Often, we find that multi-zone systems work best when you are trying to condition large spaces, multiple rooms, or areas with vaulted ceilings.

Plan for Drainage, Lines, and Maintenance

When the indoor unit is cooling, it will produce condensation. Condensate drainage lines are needed to transfer this moisture out of your home. Because of this, exterior wall installations tend to be much simpler. If you install the unit on an interior wall, you may need a condensate pump or a longer line to remove condensate.

Your ductless mini-splits should receive a fall and spring tune-up. In between, you’ll need to change the filter and perform routine maintenance tasks. Because of this, the unit should be located where it is easy to reach.

Quick Placement Checklist

As you decide on the placement of your future mini-split units, keep the following checklist in mind.

  • 6 to 8 feet high on a vertical wall
  • Clear airflow across the entire room
  • Away from direct sunlight
  • Not blocked by furniture, shelves, or curtains
  • Away from any heat-producing appliances or electronics
  • Not blowing directly onto beds or seating areas
  • Accessible for future maintenance
  • Practical access available for the outdoor unit and drain

Why Professional Installation Matters

Our technicians will confirm the sizing, clearances, line routing, wall strength, drainage, and electrical needs necessary for your new unit. We will analyze the space to determine the best placement for your comfort, energy efficiency, and equipment life. By choosing the right placement, we can help you avoid future service issues.

FAQs

How high should a mini-split indoor unit be installed?

We generally recommend placing it 6 to 8 feet off the floor. The unit should have proper clearance from the ceiling.

Can a mini-split be installed on an interior wall?

They can, but they will generally need a condensate pump, more complex drainage, or longer refrigerant lines. As a result, an exterior wall is generally easier.

Should a mini-split be installed above a bed?

In general, this is not a good location. The unit should be placed so that it doesn’t produce direct airflow over a sleeping area.

Can one mini-split cool multiple rooms?

In open layouts, a mini-split may be able to cool multiple rooms. However, separate rooms normally require separate indoor units to achieve a consistent level of comfort.

Where should you not install a mini-split?

You should never install the unit near heat sources or direct sunlight. In addition, it should not be placed in tight corners, blocked walls, hallways, or any area where the air will blow directly onto people.

Schedule Your Mini-Split Installation

The indoor placement of your mini-split units should deliver a balance of comfort, airflow, service access, and installation convenience. In most cases, this means that a high, central, and unobstructed wall will be the best location. Unsure about where to place your ductless mini-split? Schedule a professional assessment to discover the best location for your unit.

Should You Upgrade Your HVAC System Before Installing Solar Panels

While it might seem odd to upgrade your heating, ventilation, and air conditioning (HVAC) system before installing a solar panel system, there’s an important reason why this is a smart step. In a typical home, the HVAC system is one of the largest consumers of energy. If you plan on switching to a new HVAC system, it will affect the amount of solar power you need. Because of this, it’s generally a good idea to invest in a new HVAC system if your current unit is old, inefficient, or unreliable.

Why Your HVAC System Matters Before Going Solar

A solar contractor determines your ideal system size based on your electricity usage. If your current air conditioner or furnace is inefficient, it will seem as though you need far more energy than you really do. Rather than pay for extra panels and wasted energy, you should update your HVAC system first.

The Short Answer: HVAC First, If the System Is Near the End of Its Life

In general, we recommend evaluating your existing unit and replacing it if it is near the end of its life. This is especially important if your unit is already 10 to 15 years old. A replacement is more likely to be necessary if you notice any of the following symptoms.

  • Frequent repairs
  • Weak airflow
  • Increased summer energy bills
  • Short cycling
  • Uneven temperatures
  • Declining energy efficiency
  • Leaky or undersized ductwork

Getting a planned HVAC upgrade before you invest in solar panels is usually better than scrambling for an emergency replacement after your solar setup is installed.

When You Should Upgrade HVAC Before Solar

In the following situations, it makes more sense to upgrade your HVAC system before you install a solar system.

Your System Is Old or Inefficient

An older system uses more electricity than a modern unit, necessitating a larger solar array. By upgrading to a high-efficiency AC or heat pump, you can lower your cooling and heating demand. In turn, this allows you to spend less on a smaller solar installation.

Your Ductwork Is Leaky or Poorly Designed

A duct leak can lower your energy efficiency by as much as 20%. Before you decide on your solar sizing, it’s essential to complete your duct sealing, insulation upgrades, and airflow balancing.

Your Home Has Comfort Problems

When your home has uneven temperatures, humidity problems, or nonstop runtimes, you may be dealing with a duct issue or HVAC sizing problem. To find the source of the problem, you need a full HVAC assessment.

You Plan To Electrify More of the Home

Your solar panel installation is designed based on your current electricity usage. Installing an EV charger, a heat pump water heater, or an additional room increases the amount of electricity needed. Similarly, switching from a gas heating system to a heat pump increases your energy consumption, so you’ll need a solar setup sized for your future usage.

When Installing Solar First Can Still Make Sense

While an HVAC upgrade makes sense in many cases, there are scenarios where it is better to install solar panels first.

  • The HVAC is fairly new and already efficient.
  • The system performs well and is less than 10 years old.
  • You need to time your solar upgrade for a utility deadline, solar incentive, or net-metering rule.
  • Your roof is being replaced, and you want to coordinate a solar upgrade for the same time.
  • You already plan on sizing solar for a higher electrical load in the future.

Do These Efficiency Upgrades Before Either Project

Before you upgrade your system, there are a few things you can do to optimize your home’s energy efficiency. 

  • Schedule an energy audit or HVAC assessment.
  • Seal any air leaks in your home.
  • Replace the air filter.
  • Clean the condenser coils.
  • Seal and insulate your ductwork.
  • Consider upgrading to a smart thermostat.

During the assessment and your routine maintenance appointment, our team can check your refrigerant charge and test your airflow. We’ll also review your existing electrical panel capacity to see if you need an upgrade.

The Best Project Sequence for Many Homeowners

For the best results, we recommend using the following to-do list to determine your ideal capacity and install your solar panels.

  • First, review 12 months of your utility bills to get a better understanding of your home’s energy consumption.
  • Schedule an HVAC and home efficiency assessment to find out which updates are necessary.
  • Maximize your energy efficiency by fixing your insulation, sealing air leaks, and addressing duct issues.
  • Repair or replace your HVAC system if it is old or inefficient.
  • Get a solar quote based on your new, updated energy profile.
  • Coordinate any solar, battery, or electricity updates required.

How HVAC Replacement Can Affect Solar System Size

When you receive a solar proposal, it will be based on your annual kWh usage. If you have an energy-efficient HVAC system that uses less energy, you will need fewer panels. For example, an old HVAC system may use excessive electricity in the summer, requiring more solar panels. By switching to an energy-efficient system, the homeowner can cover all their needs with a smaller array.

Don’t Forget Incentives, Rebates, and Timing

Before you get a solar array or new HVAC system, check out federal, state, utility, and manufacturer incentives. You should also confirm your eligibility for federal home energy credits because these changed after 2025. Depending on which rebates and incentives are available, your decision to get HVAC or solar first may vary.

Questions To Ask Before Deciding

Before you upgrade your HVAC system and install solar, consider the following questions

  • How old is my HVAC system?
  • What is my SEER2 rating?
  • How much did I spend on HVAC repairs over the last two years?
  • Do I have leaky or badly insulated ducts?
  • Will I need to replace my roof in the near future?
  • How much will my utility provider pay for extra solar energy produced?
  • Do I plan on adding an EV charger, battery, heat pump, or electric water heater?
  • Does my current electrical panel support HVAC and solar upgrades?

Common Mistakes To Avoid

To optimize your home’s energy consumption, remember to avoid the following frequent mistakes.

  • Sizing your solar array based on an old, inefficient HVAC system.
  • Replacing your HVAC after you update your solar without changing your energy usage assumptions.
  • Ignoring leaky or damaged ducts.
  • Assuming that larger HVAC equipment is more effective.
  • Forgetting about future changes that will affect your energy load.
  • Choosing a solar company and HVAC contractor that don’t communicate and coordinate with each other.
  • Relying on outdated tax credit information.

FAQs

Should I replace my air conditioner before installing solar panels?

Yes, it’s generally better to replace old and inefficient systems before you install solar panels. Afterward, you can calculate the exact solar capacity you need based on the new installation.

Will a new HVAC system lower the cost of solar?

A new HVAC system may lower the cost of your solar installation. If it uses less electricity, you may be able to set up a smaller solar array and spend less.

Should I get a heat pump before solar?

In general, it’s better to get a heat pump before installing solar. This allows you to size the solar installation accurately so that it matches your heat pump’s energy demands.

Can solar panels run my HVAC system?

Yes, solar panels can offset the electricity your HVAC system uses. However, the solar installation must be sized appropriately so that it can supply the total amount of energy needed.

Should I upgrade my electrical panel, too?

It might be necessary. If you’re installing solar panels, a new HVAC system, an EV charger, or a heat pump, the panel capacity you need will be affected.

Learn More About HVAC Upgrade Options for Your Home

Before you install solar panels, it’s important to plan out your future HVAC needs as well. If you wait to upgrade your HVAC system, you could end up overspending on your solar capacity. Instead, plan out your HVAC system and then calculate the solar capacity you need.

Planning solar for your home? Schedule an HVAC efficiency assessment first so that your solar system is sized appropriately for your home’s actual electrical needs.

What Homebuyers Should Ask About the HVAC System Before Closing

A heating, ventilation, and air conditioning (HVAC) system is by far one of the most expensive systems in a home. When you’re investing in a real estate property, you need to be completely confident that the HVAC system is fully functional.

Unfortunately, a standard home inspection is unlikely to reveal every heating and cooling issue that exists. To avoid a costly surprise, buyers should ask HVAC-specific questions and consider having an HVAC technician perform a professional inspection.

How Old Is the HVAC System?

Before buying a home, start by asking questions about the HVAC system’s age. Even though an older system may still be functional, it could be approaching the end of its lifespan. HVAC systems that are already past their average lifespan are more likely to be less energy efficient and require more repairs. 

Once your unit reaches the following thresholds, performance issues and repairs will start to add up.

  • Air Conditioner: 10 years
  • Heat Pump: 10 years
  • Furnace: 15 years

Has the System Been Maintained Regularly?

When buying a home, always request the maintenance records. The average HVAC lifespan is only an accurate estimate if the unit has been properly maintained. If the system hasn’t had consistent seasonal tune-ups, regular filter changes, and timely repairs, it can fail years earlier than it should. 

Even if the HVAC system appears to be working properly, a lack of maintenance is a red flag. A poorly maintained unit will have hidden wear, making future repairs more likely.

Are There Any Recent Repairs or Ongoing Problems?

Recent repairs may indicate an underlying problem. For example, you should be concerned if there are repeated repairs for electrical and airflow problems. If the refrigerant has been recharged repeatedly, this indicates that there is a leak. Depending on how soon the low refrigerant levels were caught, the leak may have resulted in additional damage.

Finally, note if any key components were replaced. Once major repairs become more frequent, the unit is likely reaching the end of its lifespan.

Is the HVAC System Properly Sized for the Home?

When an HVAC system is oversized, it reaches the appropriate temperature too soon and shuts off. As soon as the temperature changes again, it switches on. This type of short cycling causes increased wear on startup components. Because the HVAC system reaches the appropriate temperature before it can lower the indoor humidity level enough, the indoor room temperature may feel unusually muggy in the summer and clammy in the winter.

Meanwhile, an undersized unit will struggle to reach the right temperature. This causes added wear because it must stay on longer to achieve the same level of performance. 

Before installing a unit, HVAC technicians normally perform a Manual J load calculation to determine the appropriate unit size. However, changes to a home’s insulation, windows, typical occupancy, and size can impact the ideal sizing. Even if the correct HVAC unit was originally installed, it may no longer be the right size for the property. For example, recent remodeling projects, additions, or conversions may put an added strain on the unit. 

When a unit is improperly sized, the occupants may notice uneven temperatures, comfort issues, and energy-efficiency problems. Over time, oversized and undersized units are more likely to require repairs and replacements.

What Type of System Does the Home Have?

The cost of maintenance and future replacements is going to depend on the type of setup the home has. First, you need to find out if it is equipped with a central AC and furnace or a heat pump. Some homes, especially ones that weren’t designed with ductwork, use ductless mini-splits. 

On top of the unit type, you should also consider if it is a packaged rooftop or ground unit. If a future replacement is needed, the packaged rooftop system is going to cost more.

What Condition Are the Ducts In?

About 20% to 30% of the conditioned air that travels through ductwork is lost to leaks. Duct inspections and sealing are essential for detecting and repairing leaks. 

When buying a home, ask if the ducts have been inspected recently. If your home has leaky or damaged ductwork, it can experience wasted energy and uneven room temperatures.

Are Permits and Installation Records Available?

In Sacramento, a permit is required for any major HVAC installation, alteration, or replacement. Other cities and counties have specific permitting requirements as well. If a homeowner has replaced the HVAC system without a permit, it can lead to complications in the future. 

Besides potential issues with the local building department, unpermitted work is cause for concern in other ways. Improper installation may affect warranty coverage, depending on the manufacturer and warranty terms. Additionally, HVAC systems are more likely to have issues if they haven’t been professionally installed.

What Are the Average Utility Bills?

One way you can see if an HVAC system is functioning properly is by reviewing the home’s average utility bills. Many electricity providers will show current and past electricity consumption on the monthly power bill. If the home’s electricity usage has increased year over year, there may be a duct leak, an aging system, or a declining efficiency level at fault.

Should You Get a Separate HVAC Inspection?

Building inspectors are not HVAC experts. In many parts of California, inspectors only need two years of journey-level construction experience and a handful of inspector-related credentials. Inspectors are not required to work as an HVAC technician or to obtain a C-20 Warm-Air Heating, Ventilating, and Air-Conditioning Contractor license.

This means a standard building inspector is unlikely to catch all of the HVAC problems that can develop over time. A licensed HVAC technician has the skills and experience to thoroughly evaluate a system’s condition. With this information, you can negotiate with the seller to cover repairs or replace the system.

If you’re buying a brand-new home, the HVAC system is new and typically still covered under warranty. For older homes and older HVAC equipment, a professional HVAC inspection is essential for understanding what your future repair costs are going to be.

Know Your HVAC-Related Risk Before You Buy

After you’ve signed the final closing papers, it’s too late to negotiate HVAC repairs with the seller. By not asking the right questions in advance, you can end up facing costly surprises after your move-in day.

The best way to prevent unexpected HVAC breakdowns and repairs is by being proactive. Ask the right questions, and request repair documentation from the seller. Additionally, prospective buyers should arrange for an HVAC inspector to review the system and test its performance. 

If there are any HVAC-related problems, talk to the seller. As long as you have the right contingencies included in your offer, you can use the HVAC inspection results to negotiate a price reduction. Alternatively, you can ask the seller to perform the necessary repairs or replacement work before you close on the home.

By reaching out to Fox Family Heating & Air, you can schedule a full HVAC inspection before you buy your next Sacramento-area home. Learn more by reaching out to our technicians today.

FAQs

Should I get the HVAC inspected before buying a house?

Getting an HVAC inspection can save you a significant amount of money in the long run. A new heat pump alone can cost between $4,238 and $7,941. If the technician discovers that something is wrong with the unit, you can negotiate a price drop or ask the seller to cover repairs instead of paying for everything yourself later on.

How old is too old for an HVAC system?

It depends on the type of unit, how much it has been used, and whether consistent maintenance has been performed. A furnace should generally be replaced after the 15-year mark. Meanwhile, heat pumps and air conditioners are more likely to require replacement after the 10-year mark.

Unfortunately, younger units can still need a replacement if they haven’t been cared for properly. The only way to know for sure if the HVAC unit is in poor condition is by having it inspected by a professional.

Can HVAC problems affect a home sale?

Absolutely. If you are selling a home that has a faulty HVAC system, the buyer can request repairs or a lower price if there is any type of inspection contingency. 

Additionally, prospective buyers may decide not to make an offer if they know that the HVAC system is malfunctioning. HVAC repairs are costly, and a home that needs a new unit likely requires other repairs as well. Even if the prospective buyer makes an offer, they will likely lower the bid to reflect their expected repair costs.

What HVAC records should a seller provide?

Sellers are not legally required to disclose maintenance records and HVAC receipts. However, sellers in California must disclose mechanical issues, prior permits, and the overall condition of the system. Sellers have to provide a Transfer Disclosure Statement indicating whether the HVAC system is in working order and identifying any known defects.

Buyers can also ask any questions they want before they close. Even if the buyer isn’t obligated to disclose maintenance records o

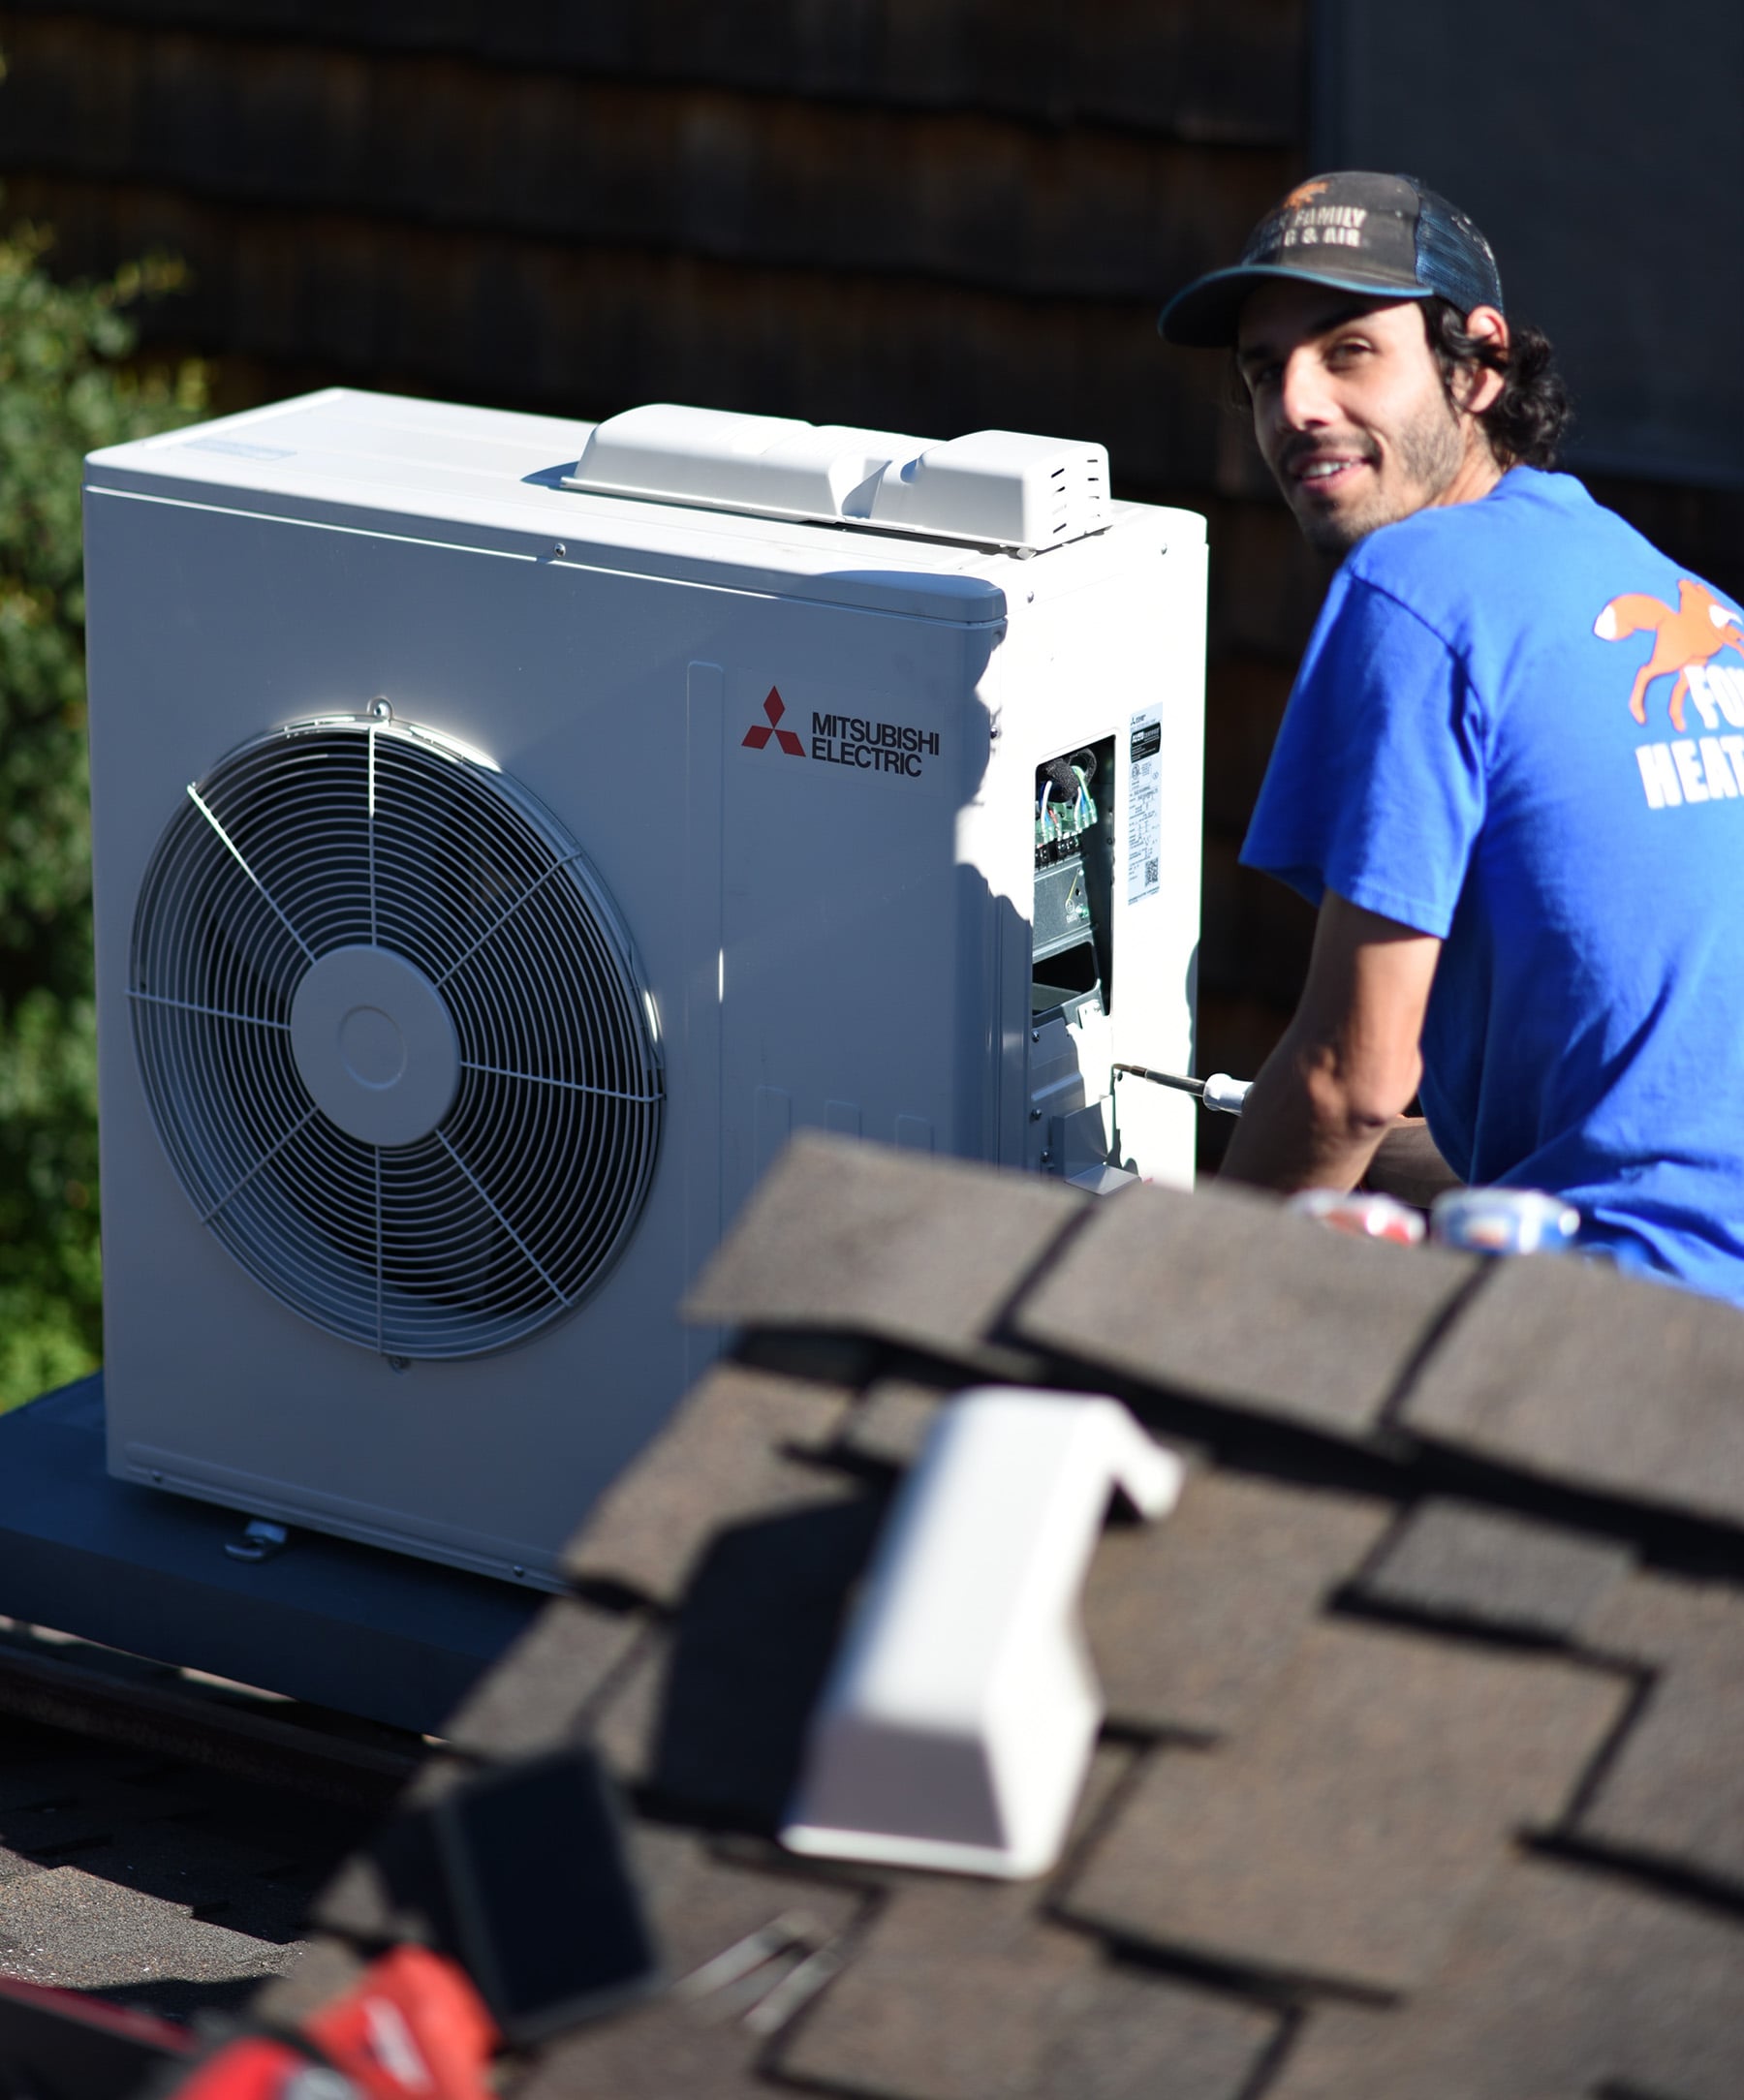
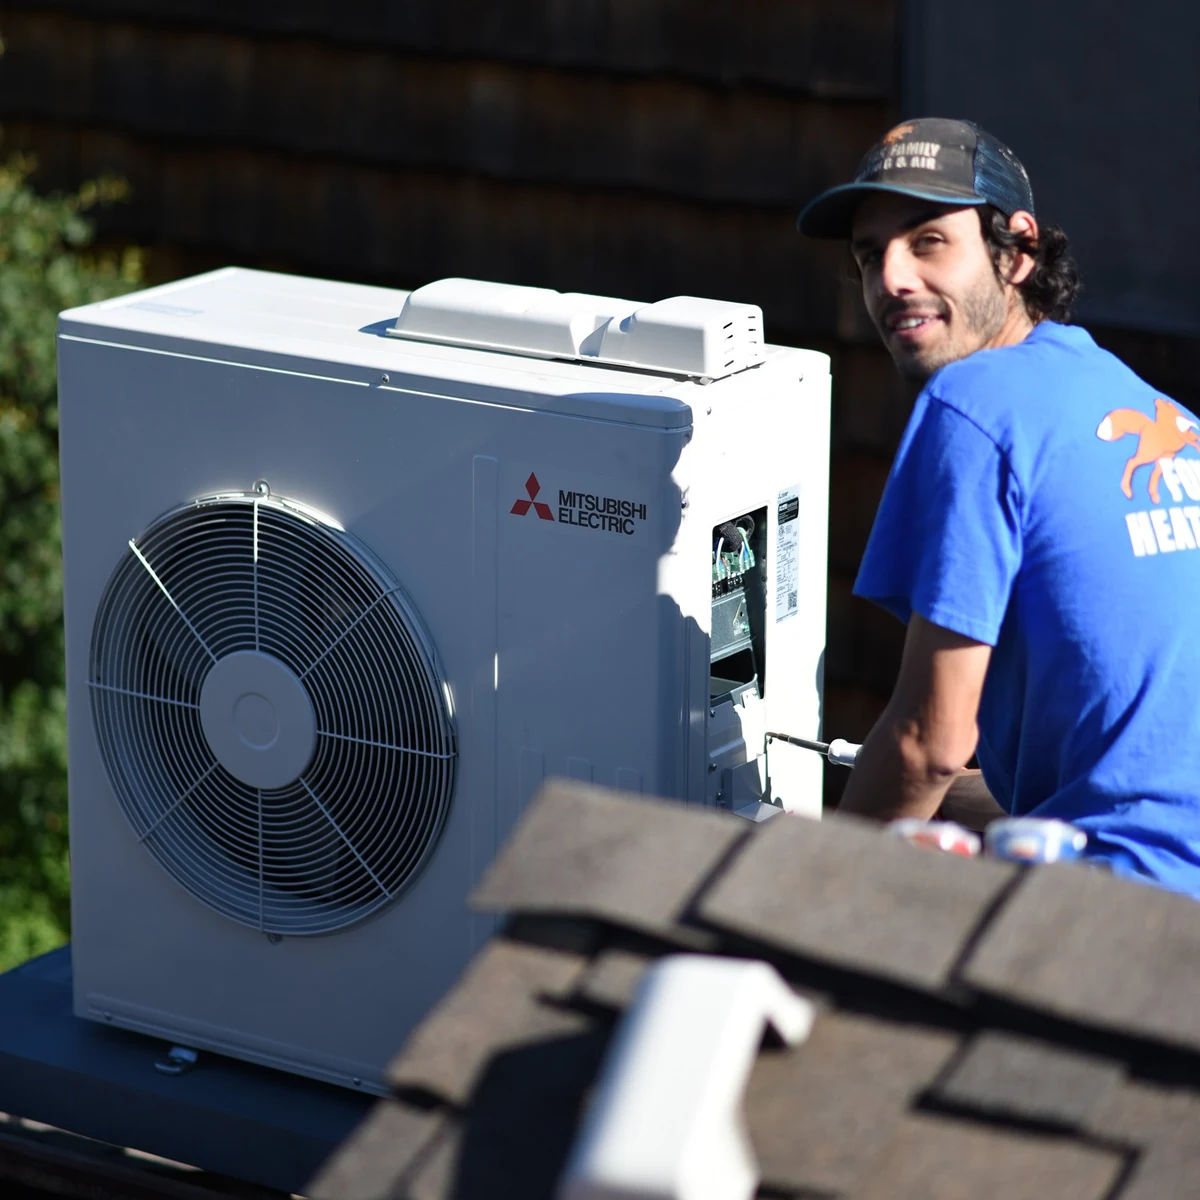
Fox Family Heating & Air Conditioning technician working on a Mitsubishi Electric mini-split outdoor unit

Should You Cover Your Outdoor AC Unit During Sacramento’s Rainy Season?

As summer draws to a close, most homeowners switch off their ACs and start preparing for colder weather. Before you set aside your AC for the year, there are a few proactive steps you can take to protect it during the rainy season. 

When wintertime arrives in Sacramento, it can bring along rain, wind, leaves, and debris. While many homeowners reach for a full AC cover to address these issues, a cover can often cause more problems than it helps. To learn more about why covers generally aren’t needed and how to care for your AC, read on.

Outdoor AC Units Are Built To Handle Rain

While a pail might rust when it’s left outside, condensers are less likely to have an issue. AC manufacturers design condensers so that they can handle outdoor weather without becoming rusted or corroded. On its own, rain is unlikely to damage the unit.

The entire design of the coil, cabinet, fan, and electrical components is made to withstand rain. Electrical components and wiring are properly insulated, so they can safely manage normal exposure to outdoor rain and moisture. Unless you have major flooding or storm damage, your outdoor unit should be able to handle wintertime weather without a problem.

When Covering an AC Unit Can Cause Problems

Installing an AC cover can lead to a few issues. As a homeowner, it’s generally better to skip the cover and opt for professional AC maintenance instead.

It Traps Moisture

Rather than protecting the AC, a cover can counterintuitively cause added harm. Full covers can trap moisture, especially if they weren’t designed with breathable fabrics. Once moisture is stuck inside, the unit can develop rust, mildew, and corrosion.

Pests Can Take Up Residence Inside the Unit

Because a cover creates a space that is protected from the elements, it can attract pest infestations. Ants, wasps, spiders, and mice can move into the unit, leading to an unpleasant surprise when you uncover it in springtime.

Covered Units Present an Operational Risk

After having the AC off for the winter, it’s easy to forget that it’= is covered up. If a family member switches the AC on without removing the cover, it can damage the unit and lead to costly repairs. The cover limits airflow and causes the unit to overheat quickly, potentially resulting in a frozen coil and damage to the compressor.

When a Partial Cover May Be Helpful

While a full cover can damage your unit and result in pest infestations, a partial cover offers a few benefits. By installing a top-only cover, you can keep leaves, branches, and debris out. Because the cover is only on the top of the AC, it ensures better airflow. Pests are also less likely to take up residence in the unit.

However, a top-only cover can still cause damage if it isn’t used appropriately. For the best results, homeowners should never use plastic tarps or airtight covers. Both of these design options can trap moisture and lead to corrosion. Whenever possible, we recommend using manufacturer-approved covers and breathable materials. The best time to add a top cover is after you are completely done using the AC for the summer. This helps to reduce the likelihood that someone turns on the AC with the cover on, protecting your AC from overheating.

What Sacramento Homeowners Should Do Instead

As a general rule, we don’t recommend using a full cover on your outdoor air conditioning unit. Instead, homeowners should perform the following maintenance activities to keep their ACs functioning at their best. 

  • Clear Debris: Periodically, you should clear any leaves or debris that are around the outdoor unit. There should be 2 to 3 feet of clearance from debris to ensure proper airflow. Additionally, the AC should be installed at least 1 to 2 feet from your home.
  • Clean Your Gutters: If your gutters have debris buildup, it can cause water to drop on the AC unit and increase the likelihood of corrosion. Clean gutters protect your AC and home from water damage.
  • Direct Water Drains Away From the Pad: Your AC is set up with a condensate drain line that carries water away from your home. To avoid pooling water around your AC or home, the drain line should be installed so that it directs water away from the AC pad and your home’s foundation.
  • Trim Vegetation: Whenever you mow your lawn, you should make sure to trim vegetation that is around the outdoor unit. For easier care, some homeowners use gravel or pavers around their outdoor unit.
  • Schedule Maintenance: One of the most important things you can do to protect your AC is to schedule routine maintenance. Timely heating, ventilation, and air conditioning (HVAC) maintenance can prevent major repairs. During the maintenance appointment, our team will clean the unit, lubricate moving parts, and inspect each component. Routine maintenance can prevent issues from happening and detect problems early, so you can spend less money on repairs.

Never Run Your AC While It Is Covered

One of the most important things to remember is to only use the AC cover when your unit is off for the winter. Never run your AC when it is covered. A covered unit can restrict airflow, leading to overheating. In the short run, this can cause AC shutdowns and poor AC performance. Before long, the poor airflow and overheating can damage the compressor. If you decide to use a cover during the wintertime, make sure to remove it before you switch your AC back on. You should also clean the coils, replace your indoor filter, and look for any signs of damage before running your AC for another year.

Signs Rain or Debris May Have Affected Your AC Unit

Over time, rain and debris can damage the AC. If you notice any of the following symptoms, it’s time to schedule professional AC repairs.

  • Strange Noises: When you hear loud rattling or buzzing noises, it may be due to debris entering your AC unit. Alternatively, the fan blades or motor may have been damaged by the wind.
  • Frequently Tripped Breakers: If your breakers keep tripping after being reset, you should immediately stop using your AC. This indicates an underlying electrical problem, which can be caused by rain and debris damage. It can also be due to other factors as well, so a professional inspection is necessary.
  • Poor Cooling Performance: An outdoor unit can experience blocked airflow if there is debris inside the unit. This can result in poor cooling performance.
  • Standing Water Around the Outdoor Unit: If you notice standing water around your outdoor unit, rust, corrosion, and mildew may already be damaging your AC. It is not safe to use an outdoor unit that is surrounded by water. Call our HVAC team for an inspection. While you wait, remove the water and let the unit dry completely if it is safe to do so.
  • Visible Rust: Any signs of rust or corrosion are indications that rain may have already affected your AC unit. To avoid performance issues and costly repairs, these problems need to be addressed right away.
  • Bent Coil Fins: Debris can cause bent coil fins, which impact the airflow around the coil. As a result, your AC has to work harder to transfer heat, requiring more energy consumption.

Prepare Your AC for the Rainy Season

In Sacramento, outdoor air conditioning failures are more commonly associated with age, lack of maintenance, restricted airflow, or component wear than with normal rainfall. Using a cover can block airflow and trap moisture, leading to corrosion and decreased efficiency. Eventually, these issues can cause components to stop working. If you are concerned about your outdoor unit, Fox Family Heating & Air can help. Our team can inspect, clean, and prepare your outdoor unit so that it is ready when the next cooling season arrives.

Learn more by scheduling your AC cooling services today. 

FAQs

Can rain damage my outdoor AC unit?

Your AC is designed to be extremely durable. Electrical components and wiring are insulated from moisture, so they aren’t affected. In most cases, rain is only going to be a problem if it remains trapped against your outdoor AC unit for extended periods of time.

Should I cover my AC unit in winter?

In general, covering your AC is not necessary. Your outdoor unit is designed with materials, paints, and components that are able to withstand rain. The bigger risk is from dirt, leaves, and debris clogging the unit and trapping moisture. As a part of shutting your AC off for the year, this debris should be removed.

What kind of AC cover is safest?

An outdoor AC cover is not necessary. If you do use a cover, it should be designed with a breathable fabric that prevents moisture from building up next to the unit. There are mesh and polyester top covers that are expressly made for ACs. Never use plastic or DIY covers because these can trap moisture, leading to corrosion and electrical failures.

How much clearance should my outdoor unit have?

Ideally, the unit should be at least 1 to 2 feet away from anything else. Above the unit, there needs to be a minimum of 5 feet of clearance to ensure proper airflow. Throughout the year, you should clear debris, grass clippings, and plant matter that are within 3 feet of the unit.

How Long Do Heat Pumps Last in Northern California?

Heat pumps are known for being incredibly energy efficient, and they are well-designed for Sacramento’s moderate climate. However, even the best heat pumps can eventually need a replacement. As a homeowner, there are proactive steps you can take to extend the lifespan of your unit and plan for future replacements.

Average Heat Pump Lifespan in Northern California

In Northern California, we have a mild, Mediterranean climate. While heat pumps might not have to work as hard during our coldest and hottest days as they do in other parts of the country, they face other sources of wear. Because heat pumps are used year-round in our area, they undergo more wear and tear than central ACs and furnaces.

Typical Lifespan for Central Heat Pumps

On average, a heat pump will last 10 to 15 years before it needs a replacement.

Why Most Heat Pumps Last Around 10 to 15 Years

Eventually, a compressor failure, major refrigerant leak, reversing switch breakdown, or a similar problem can cause HVAC repairs to be cost-prohibitive. At this stage, the best option is a replacement. Because heat pumps must operate year-round to heat and cool your home, they typically last just 10 to 15 years before they have to be replaced.

When Well-Maintained Systems Can Last 15 to 20 Years

However, well-maintained units can extend this lifespan because they experience less wear. For example, routine maintenance allows you to catch minor refrigerant leaks, dirty coils, and other problems that can strain the unit and cause premature breakdowns. With proper maintenance, a heat pump can last as long as 20 years.

Ductless Mini-Split Heat Pump Lifespan

Ductless mini-splits often last 10 to 20 years. If it is well-maintained and produced by a quality manufacturer, the unit can last over 20 years.

Why Mini-Splits May Last Longer Than Traditional Systems

Mini-splits last longer because they have variable-speed motors and don’t rely on ductwork. With a variable-speed motor, the mini-splits can operate at a low speed and avoid frequent startups. This reduces wear over time while ensuring a comfortable home.

Ductless mini-splits also avoid ductwork-related wear. Duct leakage increases system workload and runtime, which leads to increased wear over time.

Outdoor Unit vs. Indoor Unit Lifespan

Your outdoor unit may show signs of wear before your indoor unit due to its exposure to the elements and debris.

Why Northern California’s Climate Can Help Heat Pumps Last Longer

The good news is that our climate can help extend the lifespan of our heating, ventilation, and air conditioning (HVAC) equipment.

Mild Winters Reduce System Strain

Thanks to our mild winters, our heat pumps don’t have to work as hard to keep homes warm.

Fewer Extreme Cold Cycles Compared to Colder Regions

While we do experience extreme cold snaps, they occur less often, are less intense, and last for shorter durations than they do in colder states.

Hot Summers Still Create Wear and Tear

However, summer weather can still lead to added wear and tear.

Sacramento Valley Heat and Long Cooling Cycles

In the Sacramento Valley, summers can get hot. This leads to longer cooling cycles and more wear on heat pump units.

Bay Area Microclimates and Coastal Conditions

Additionally, our area has different microclimates that have unique weather patterns. In coastal areas, the marine layer and increased humidity can cause a heat pump to work harder.

Wildfire Smoke and Air Quality Concerns

Over the years, wildfire smoke has emerged as a major indoor air quality concern (IAQ) for Sacramento homes.

How Smoke Clogs Filters Faster

For your heat pump, one of the biggest smoke-related issues is clogged air filters. Each time your unit runs, the filter removes contaminants from the air. As a result, the filter must be changed more frequently.

Why Coil Cleaning Matters After Heavy Smoke Seasons

Even with frequent filter changes, your evaporator and condenser coils may develop buildup faster because of the smoke-laden air. Because of this, regular coil cleaning is more important during and after heavy smoke seasons.

Factors That Affect Heat Pump Life Expectancy

There are several important factors that influence how long your heat pump will last.

Installation Quality and Proper Sizing

If your installation was done incorrectly or the unit is the wrong size, it will wear out sooner. Additionally, you’ll end up spending more on energy costs.

Why Manual J Load Calculations Matter

Manual J load calculations are essential for determining the right heat pump size for your home. If you perform renovations, upgrade your insulation, or make other changes to your home, you’ll need to perform this calculation again.

How Oversized or Undersized Units Wear Out Faster

An oversized heat pump will reach the appropriate temperature too quickly and shut off. Besides causing additional wear, the frequent startups and short cycles mean that the heat pump may not have enough time to pull moisture from the air. This can make your home feel clammy and humid.

Meanwhile, an undersized unit will struggle to maintain the temperature. It will stay on for longer periods of time, leading to more wear and premature component failure.

Maintenance Habits

Proper heat pump care plays a major role in how long the system lasts.

Filter Replacement Schedule

Filter changes should be done every 30 to 90 days. During periods of more intense usage, these replacements should occur more often.

Seasonal Tune-Ups

By scheduling routine maintenance in the spring and fall, you can catch minor issues before they escalate.

Outdoor Unit Cleaning

Cleaning around the outdoor unit helps prevent clogged condenser coils, which improves your unit’s airflow and reduces the strain it experiences.

Usage Patterns

Finally, your usage patterns will determine how quickly parts break down.

Year-Round Heating and Cooling Use

Because heat pumps are used year-round, they experience more use than a traditional AC or furnace.

Thermostat Settings and System Runtime

Your personal temperature preferences also play a role. If you keep your home freezing cold in the summer and hot as a sauna in the winter, it’s going to experience additional wear.

Signs Your Heat Pump May Be Near the End of Its Life

Your heat pump may be approaching the end of its lifespan if you notice the following symptoms.

Rising Energy Bills

Increased energy costs are a sign that your unit is less efficient.

Frequent Repairs

As heat pumps approach the end of their lifespans, repairs will become more frequent.

Uneven Heating or Cooling

If your heat pump is struggling or you have ductwork problems, you’ll notice uneven performance levels in different rooms.

Strange Noises or Short Cycling

Short cycling and unusual sounds are indications that something is wrong with your unit.

Reduced Comfort Despite Normal Thermostat Settings

If your thermostat settings are normal and your comfort level declines, your heat pump is approaching the end of its lifespan.

Should You Repair or Replace an Older Heat Pump?

There are a few ways you can frame your decision between repairing and replacing your system.

When Repair Makes Sense

Heat pump repairs are often the best choice if your unit is younger than 10 years old, has seldom required repairs in the past, or the repairs are relatively inexpensive. Additionally, you may want to opt for repairs if you plan on moving in the near future and don’t want to make a long-term investment in your home.

When Replacement Is the Better Investment

There are a few situations where a heat pump replacement will be the better choice.

Repair Cost vs. Replacement Cost

When it comes to HVAC replacements, the $5,000 rule is a general rule of thumb. If the age of your unit multiplied by the cost of repairs is less than $5,000, performing repairs is generally the best option. When the resulting figure is higher than $5,000, a replacement will be the better course of action.

Age, Efficiency, and Warranty Status

However, the $5,000 rule is just a guideline. You’ll also want to consider how old your unit is, how efficient it is, and your warranty status. If your warranty covers the repair costs fully and the unit still has a good energy-efficiency level, repairs are likely the best choice.

How To Help Your Heat Pump Last Longer

As a Sacramento homeowner, there are a few things you can do to extend your heat pump’s lifespan.

Replace or Clean Filters Regularly

Filter changes are one of the most effective ways to help your unit last as long as possible. Depending on the manufacturer and usage patterns, your filter should be replaced every 30 to 90 days.

Keep the Outdoor Unit Clear

Debris and plant matter can clog the outdoor unit and reduce airflow. Ideally, there should be a 2- to 3-foot space around the unit that is kept free of debris.

Schedule Professional Maintenance Twice a Year

During your tune-up, our technicians will inspect and clean your components. This helps to reduce wear and improve your overall efficiency. Our team will also inspect for signs of damage, so faulty components can be replaced before they cause a major breakdown.

Address Small Problems Early

When something breaks down, it pays to address the problem right away. Left untreated, minor issues can spiral into costly repairs and replacements.

Final Recommendation for Northern California Homeowners

If you live in Northern California, there are proactive steps you can take to make sure your heat pump lasts as long as possible in our local climate. Routine maintenance, timely repairs, and regular filter changes can greatly extend the lifespan of your unit.

Plan Ahead if Your Heat Pump Is Over 10 Years Old

Even with the best care and maintenance, heat pumps will eventually need to be replaced. Once your heat pump is over 10 years old, it is a good idea to start planning ahead and saving for a future replacement. If a replacement is outside of your budget, our convenient financing options can help.

Book a Professional Inspection Before Peak Heating or Cooling Season

When extreme summer heat or winter cold arrives, you can’t afford to have your heat pump break down. With the help of Fox Family Heating & Air, you can make sure your system is prepared for the busy season.

Schedule your heat pump inspection today.

Furnace Exhaust Pipe: What PVC Venting Does and Warning Signs to Watch

If your home uses a gas furnace, your maintenance tune-ups are essential for preventing potentially dangerous furnace problems. Gas furnaces rely on combustion to heat the air, which produces combustion byproducts, such as carbon monoxide. Your furnace exhaust pipe is normally responsible for directing these byproducts outside your home. Because of this, it’s essential to get help as soon as you think you notice signs of an issue.

What Does a Furnace Exhaust Pipe Do?

Your furnace exhaust pipe plays an integral role in the safety and efficiency of your home’s heating, ventilation, and air conditioning (HVAC) system. If it isn’t working properly, the increased carbon monoxide levels can be life-threatening.

Removes Combustion Gases From the Home

PVC venting is designed for modern, high-efficiency furnaces. It consists of an intake and an exhaust pipe. The exhaust system removes combustion gases while condensate is drained through the condensate system. Because high-efficiency furnaces have cooler exhaust gases, they can safely use PVC pipes to vent the gas and liquid.

Why Carbon Monoxide Safety Matters

Carbon monoxide is a byproduct of combustion. It is completely odorless and colorless, which is why it poses such a risk. If your exhaust pipe has a leak, dangerous levels of carbon monoxide can build up.

Helps the Furnace Operate Safely and Efficiently

The exhaust pipe is an essential part of your unit. Without it, carbon monoxide could end up in your home.

How Blocked Venting Can Trigger Shutdowns

Because of the risk of carbon monoxide and combustion byproducts, there are certain safety mechanisms set up to protect the unit from potential damage and your family from gas buildup. When the vent pipe or flue is blocked, it affects the draft inducer fan’s vacuum pressure. In turn, this causes the pressure switch to shut off your furnace.

Why Some Furnaces Use PVC Exhaust Pipes

You’ll typically see PVC used in modern high-efficiency and condensing furnaces because these designs have cooler exhaust.

High-Efficiency Furnaces Produce Cooler Exhaust

High-efficiency furnaces generally have AFUE ratings of 90% or higher, while premium models may reach 95% or more. This is an improvement over traditional furnaces, which have a baseline AFUE of 80%.

These higher efficiencies are obtained by using more of the furnace’s heat. Instead of letting heat leave the furnace through the exhaust, the high-efficiency furnace uses this heat to warm your home. As a result, high-efficiency furnaces produce a cooler exhaust.

Why PVC or CPVC Can Be Used for Condensing Furnaces

A cooler exhaust means that plastic materials, like PVC or CPVC, can be used. Normally, CPVC is used for warmer areas next to the furnace, while PVC can be used for the rest of the exhaust pipe.

PVC Handles Condensation From High-Efficiency Systems

PVC pipes are extremely durable, which is one reason they are the material of choice for high-efficiency systems. They’re also capable of handling acidic liquids, such as the condensation that comes from your furnace. 

Why Condensate Drainage and Pipe Slope Matter

Because your furnace creates condensate, the pipe needs to have the appropriate slope so that it drains away from your unit.

PVC Venting Is Not for Every Furnace

While PVC venting is durable and an effective choice for high-efficiency furnaces, it is not ideal for standard units.

Why Older Standard-Efficiency Furnaces Usually Use Metal Venting

On older furnaces, the system was designed to let heat escape. Like chimneys, the vents relied on hot air to rise and lift the combustion gases out of your home. Because the heat remains in the exhaust gas, these furnaces cannot use heat-sensitive PVC pipes.

In comparison, high-efficiency furnaces remove so much of the exhaust heat that the combustion byproducts condense into a cool liquid. Because the temperature is so much lower, PVC venting can be used to transfer these byproducts outdoors.

PVC Furnace Venting vs. Metal Furnace Venting

While a high-efficiency furnace is set up with a two-pipe direct venting system and PVC exhaust, standard furnaces rely on metal flues and chimney venting.

High-Efficiency Furnace Venting

Most high-efficiency furnaces rely on a two-pipe direct vent system so that the condensate can be vented outside of your home.

Sidewall Venting

An inducer fan helps move exhaust gases outdoors. Because the system uses induced draft rather than natural draft, the pipes can run horizontally.

Two-Pipe Direct Vent Systems

High-efficiency units generally use two pipes. One pipe brings in fresh air, while the other pipe vents the combustion gases.

Condensate Drainage Requirements

Combustion gases in condensing furnaces create acidic condensate as they cool. Because of this, your system needs the appropriate slope so that the condensate can be drained away and neutralized before it enters your plumbing system.

Standard-Efficiency Furnace Venting

A standard-efficiency furnace has hotter temperatures, which is why it relies on metal instead of PVC.

Hotter Exhaust Temperatures

Because the exhaust air is hot, it rises upward. As a result, the chimney vent and flues will generally be set up so that they exit your roof.

Metal Flues and Chimney Venting

Metal flues are necessary because of the hot exhaust temperature. Often, these flues are made out of Type B vent pipe or other galvanized metal venting materials.

Warning Signs of Furnace Exhaust Pipe Problems

If you notice any of the following symptoms, you may be having issues with your exhaust pipe.

Exhaust or Burning Odors

When an exhaust leak occurs, you may notice the smell of something burning.

Rust or Corrosion Near the Furnace

Over time, metal pipes can corrode. Once this occurs, you’ll likely need a replacement.

Water Leaks or Condensation Around the Pipe

Other than a leak in the pipe, the presence of condensation and water may be due to slope-related issues or a blocked pipe. The condensate is acidic, so it shouldn’t be allowed to escape your system. 

Soot Around Vents or Furnace Components

The presence of soot means your exhaust is backdrafting in your home, which is an immediate safety issue.

Furnace Short Cycling or Shutting Off

Short cycling may be connected to a blocked exhaust pipe or the pressure switch. Both of these issues require a professional diagnosis.

Weak Heating Performance

Poor heating performance is a sign that something is wrong with your furnace. Timely repairs can prevent minor problems from escalating into costly breakdowns.

Visible Cracks, Loose Connections, or Blockages

Any cracks, loose connections, or blockages could allow toxic exhaust gases to get into your home.

Common Causes of Furnace Venting Problems

There are a few frequent reasons why venting problems occur.

Blocked Outdoor Vent Openings

If the outdoor vent is blocked, it can cause exhaust gases to end up in your home.

Leaves, Nests, Snow, or Debris

This type of problem can occur from bird nests, snow, or a range of other causes.

Improper Pipe Slope

You can think of the pipe’s slope like a small hill. If the hill isn’t steep enough, the liquid won’t flow away.

Condensate Pooling Inside the Vent

You can tell if there is an improper slope because there will be condensate pooling inside the vent.

Cracked or Disconnected Vent Pipes

Any damaged vent pipes need to be dealt with immediately. Turn off your unit until an HVAC technician can repair the issue.

Why Loose Joints Are a Safety Concern

Loose joints allow exhaust to escape, which represents an immediate safety hazard for your family.

Aging or Corroded Vent Materials

Over time, aging and corroded materials can develop cracks. Because the damage can allow exhaust gas to enter your home, it should be repaired promptly.

What Homeowners Can Safely Check

As a homeowner, there are a few troubleshooting tips you can do on your own before you reach out for professional help.

Look at Outdoor Vent Openings

Inspect and remove blockages in your vent openings.

Check for Water Around the Furnace

Note any water around your furnace. When you call for help, mention this issue to the HVAC technician.

Listen for Unusual Startup Noises

Odd sounds can help an HVAC technician diagnose the problem. For example, a continuous clicking sound may mean your furnace’s igniters aren’t working properly.

Watch for Error Codes or Repeated Shutdowns

Repeated shutdowns can occur if your furnace overheats or the pressure switch is triggered. Similarly, error codes are a clear sign that something is wrong.

Confirm Carbon Monoxide Detectors Are Working

For the safety of your home and family, it’s important to test your carbon monoxide detectors at least once a month.

When To Call a Professional

You should immediately stop using your furnace and call for help if you notice any of the following symptoms.

Carbon Monoxide Alarm Goes Off

Your carbon monoxide alarm going off means carbon monoxide is present. Leave your home immediately and contact emergency services or your gas utility to investigate the source. Then, call our HVAC team for help. If it is safe to do so, you should shut off the furnace.

You Smell Exhaust or Gas

You should immediately evacuate your home and call your local gas company if you smell exhaust or gas. Turn off your furnace if you can do so safely.

Furnace Keeps Shutting Down

When your furnace keeps shutting down, it may be due to overheating or the pressure switch getting triggered. These issues may damage your furnace and lead to potential safety risks, so stop using your furnace and call for help.

You See Rust, Soot, Water, or Pipe Damage

Any rust, soot, water, or pipe damage should be addressed by a professional.

You Are Unsure Whether the Venting Was Installed Correctly

Poor venting can put your family at risk, so you should immediately evacuate the area and call for help if there are any venting issues.

Final Safety Recommendation

Because of how important furnace venting and exhaust pipes are, you should immediately seek help if they aren’t working properly. Our HVAC team offers same-day services and emergency repairs, so you can get help as soon as you need it.

Do Not Ignore Furnace Venting Issues

For the safety of your home and loved ones, you should never ignore furnace venting issues. Our team can evaluate your furnace venting and determine if any changes are needed.

Schedule Annual Furnace Maintenance and Vent Inspection

If your furnace exhaust pipe is broken, our team can help. We can conduct a full vent inspection, so you can enjoy peace of mind. Plus, our annual furnace maintenance services can help you prevent future issues and detect problems before they escalate.

Learn more about furnace maintenance and repairs by reaching out to Fox Family Heating & Air today.

Thermostat Fan On vs Auto: Which Setting Should Sacramento Homeowners Use

If your home’s indoor temperatures aren’t comfortable, your fan settings may be at fault. Most people don’t think about how their fan settings affect their family’s comfort. While they might sound similar, the “auto’ and “on” have different effects.

What the Fan Setting on Your Thermostat Controls

On your thermostat controls, you have an “on” and “auto” setting. These are designed for different purposes, so it’s important to understand how they work.

What “Auto” Means

The “auto” setting essentially means your fan turns on when a set temperature is reached. While this means air circulates less in your home, it also improves your energy efficiency.

Fan Runs Only During Heating or Cooling Cycles

If your fan is set to “auto” mode, you can tell by checking your thermostat or noting when your fan switches on. In this setting, the fan will only run when a heating or cooling cycle is on.

What “On” Means

Meanwhile, the “on” mode will keep your fan on continuously. Although this means the fan uses more energy and the wind-chill effect may make the home feel chillier in the winter, the added circulation is great for keeping your family comfortable during the summer.

Fan Runs Continuously, Even When the System Is Not Heating or Cooling

Once the “on” setting is selected, your fan will be on whether your system is heating and cooling your home or not. If you put your hand next to a vent, you will always feel airflow.

The Case for Using “Auto” in Sacramento Homes

There isn’t a single mode selection that works for every Sacramento home on every day and season. Both modes offer different benefits for specific situations.

Lower Energy Use

With “auto” mode, you’ll typically save money on energy consumption. This makes it a common default option in local homes.

Why Auto Usually Costs Less to Run

This mode costs less to run because your fan isn’t on all the time. If your energy bill is a major concern, this option is a good one to choose.

Less Wear on the Blower Motor

Another advantage of “auto” mode is that it leads to less wear on the blower motor, decreasing the likelihood of premature repairs.

Why Constant Fan Operation Can Shorten Component Life

When a fan is used constantly, the motor has to run for longer periods of time. As a result, the blower motor can break prematurely.

Longer Filter Life

Normally, filters should be changed every 30 to 90 days. With “on” mode, you often have to change the filter more frequently than this rate.

Why Filters Get Dirty Faster When the Fan Runs All Day

A fan that runs all day is constantly bringing in air through the filter, which causes the filter to become dirty much earlier than it otherwise would.

Better Summer Efficiency

When temperatures start to rise, using “auto” mode can help you save money.

How Continuous Fan Use Can Pull Warm Attic or Wall Air Through Leaky Ducts

If your fan is on constantly, it affects the pressure in your home. Warm attic and wall air can get pulled through leaks in your ducts. 

Besides leading to dirtier filters, this situation also means your air conditioner will have to work extra hard to cool the air. This is because moisture normally condenses on the evaporator coil between cycles, so constant fan operation pulls the moisture in your home. When your heating and cooling system eventually turns on again, it has to work harder to reduce your indoor humidity.

When the “On” Setting Can Be Helpful

While there are advantages to using “auto” mode, there are also situations where using “on” mode is the best choice.

Uneven Temperatures Between Rooms

Constant air circulation is effective when your home is experiencing uneven temperatures. By keeping the air moving, you can gradually reduce the temperature differential.

Homes With Hot Upstairs Rooms or Cold Back Bedrooms

This is particularly important in homes that have hot upstairs rooms, cold back bedrooms, or south-facing rooms with a lot of windows. The added circulation helps to move air from hotter and cooler rooms so that your heating, ventilation, and air conditioning (HVAC) system doesn’t have to work as hard.

Indoor Air Quality (IAQ) Concerns

When wildfire season arrives, or Sacramento’s smog rolls through, it affects your whole family’s respiratory health. For people who suffer from asthma, allergies, and other respiratory illnesses, IAQ concerns can be particularly challenging.

More Air Passing Through the Filter

Switching your fan on can improve your air quality. More air is sent through your filter, removing harmful particulates. During our worst air pollution days, it’s a good idea to adjust your fan’s settings.

When Upgraded Filtration May Help

If changing the mode doesn’t impact your air quality enough, you may need a filtration or IAQ upgrade. Our HVAC technicians can quickly test your home’s air quality and help you set up the right IAQ options for your needs.

Short-Term Odor or Stale Air Issues

Sometimes, homes will have odors from burned food or stale air following a long vacation. In these situations, it makes sense to turn your fan on longer.

Temporary Air Circulation After Cooking, Cleaning, or Guests

After using a lot of cleaning products, cooking food, or hosting guests, your home may have new odors. It only takes a few hours of runtime to remove unwanted smells.

Downsides of Leaving the Fan On All the Time

While there are benefits to using “on” mode, homeowners need to weigh these advantages against the higher electricity bills, frequent filter changes, increased wear, and comfort changes.

Higher Electricity Bills

If a fan is on all the time, you’ll use more electricity to run the fan. Often, air will be pulled in through your duct leaks when the fan is on, so your HVAC system will also have to use energy to condition more air.

More Frequent Filter Changes

Whenever the fan is on longer, it will collect more pollutants from the air. As a result, your HVAC system will require more filter changes.

More Blower Motor Wear

Similarly, your blower motor will wear down earlier if it is left on all the time.

Possible Drafty Feeling Indoors

When the air keeps circulating, it can lead to a drafty feeling. While this might feel great in the summer, a draft can make you feel chilly during the wintertime.

Reduced Cooling Comfort in Some Homes

The added strain on your system can reduce your cooling performance and comfort. However, this will also depend on your HVAC maintenance, capacity, and similar factors.

Best Fan Setting for Sacramento’s Climate

In Sacramento’s unique climate, there are specific situations where each type of fan mode should be used.

Use “Auto” for Everyday Efficiency

For the maximum everyday efficiency, we generally recommend using “auto” mode as your go-to option.

Best Choice During Hot Sacramento Summers

In particular, “auto” is useful during our hot summers. The change in pressure can pull air in through your duct leaks when you run the fan. By using the fan less, you can avoid this problem and spend less money running your AC.

Use “On” Temporarily for Air Circulation

Meanwhile, we recommend using “on” to solve temporary problems. This helps you achieve the benefits you need without drastically increasing the wear on your unit or your energy costs.

Best for Short Comfort or Air Quality Needs

In general, the “on” mode is ideal for short-term comfort or IAQ problems. You can turn this mode on when you’re cooking or when smog is present. If you have uneven temperatures during especially hot afternoons, you may want to temporarily run the fan to achieve more even levels of comfort.

Consider “Circulate” if Your Thermostat Has It

If your thermostat has the “circulate” setting, you can use it to circulate air at a low setting. Often, modern thermostats will also let you run the fan for a set amount of minutes every hour, which is great for temperature balancing.

A Middle-Ground Option Between “Auto” and “On”

This option is basically a middle-ground option. You get some of the enhanced comfort and IAQ benefits of “on” mode, but you also get to have less on energy costs and HVAC wear.

When Fan Setting Problems Point to a Bigger HVAC Issue

Adjusting your fan settings is the first step toward adjusting comfort and airflow issues. If this change doesn’t help, it’s important to reach out to one of our HVAC technicians to diagnose the underlying problem. The following symptoms are signs that you need professional assistance.

Rooms Still Feel Uneven in “On” Mode

If your room temperatures feel uneven after continuously circulating air, you may be dealing with leaky ducts, airflow restrictions, poor insulation, or other issues.

Fan Runs Constantly Even in “Auto” Mode

Your fan should only be running when your heating and cooling system is on. If it runs continuously, you may have a shorted wire, a stuck fan relay, or an issue with your thermostat.

Weak Airflow From Vents

Blower motor problems, leaky ducts, obstructed vents, and frozen coils are just a few of the problems that can result in poor airflow.

Dust Builds Up Quickly After Filter Changes

This type of symptom is often related to leaks and gaps in your ductwork. Our experienced HVAC technicians can help by inspecting your ductwork and sealing any leaks we find.

Final Recommendation for Sacramento Homeowners

As a homeowner, you can follow a general rule of thumb about when to use each fan mode.

Start With “Auto,” Then Adjust Based on Comfort

Homeowners should start by switching their thermostat to “auto” mode as the default option. Then, “on” mode can be used temporarily when there are specific IAQ problems, comfort concerns, or odor issues.

Schedule Service if Airflow or Comfort Problems Continue

Consistent airflow and comfort issues indicate that something is wrong with your HVAC system. Over time, minor issues can escalate into costly repairs and unexpected breakdowns. Our team can help you maximize your family’s comfort this summer through our convenient maintenance inspections, same-day services, and trusted technicians.

Book your next HVAC inspection today.

Why Does My AC Smell Musty When It Turns On? Drain Lines, Coils, and Mold Warning Signs

You’re relaxing after a long day at the office when your AC kicks on. Suddenly, a moldy, damp odor wafts over. 

When your AC starts to smell like mold, the likely culprit is moisture buildup in your heating, ventilation, and air conditioning (HVAC) system. Mold and mildew can affect your respiratory health, so it’s important to be proactive about addressing the source of the smell.

Why Your AC Smells Musty When It Turns On

Before we can diagnose how to fix the musty odor, it helps to understand what it is, why it happens, and why it is not a normal symptom.

What a Musty Smell Usually Means

When a musty odor occurs, it is generally due to mildew and mold growth in your HVAC system. Moisture is building up somewhere it shouldn’t. The only way to remove the odor is to fix the moisture buildup.

Why Is the Smell Often Stronger at Startup

Mold and mildew can accumulate in the drip pan and evaporator coils. When the AC first turns on, the accumulated spores are blown into the rest of your HVAC system.

Why Mildew Odors Should Not Be Treated as Normal

Mildew odors only occur if something is wrong with your HVAC system, so ignoring the odor won’t make it go away. Left untreated, the underlying problem can eventually need more frequent repairs.

Common Causes of a Musty Smell From Vents

Before you can resolve the odor, the first step is determining the source.

Clogged Condensate Drain Lines

Drain lines are designed to move moisture away from your AC. If they become clogged by debris or mold, water can back up into the drain pan. 

Dirty Evaporator Coils

When the evaporator coils are dirty, they are more likely to freeze. The added moisture leads to mold and mildew growth as well as reduced energy efficiency.

Standing Water in the Drain Pan

Any time there is standing water in your drain pan, it can allow mildew to develop.

Mold or Mildew Growth Inside the System

Mold and mildew can grow inside your AC and your ductwork if moisture is present. This type of growth is even more common because of the AC’s cold environment.

Dirty Air Filters and Restricted Airflow

When your air filters become clogged, they restrict airflow. This reduced airflow increases the likelihood that your evaporator coils freeze. In turn, moisture from the frozen coils can cause mildew growth.

Could Mold Be Growing in Your HVAC System?

While some people are extremely sensitive to any mold, it isn’t always obvious that mold is growing in your AC. If you notice any of the following symptoms, it is time to get your AC checked out.

Warning Signs of Possible Mold in Your HVAC System

The following list includes the most common signs you may have mold in your HVAC system.

  • Musty odors, especially when you first turn the unit on
  • Worse allergy symptoms and respiratory problems
  • Unexplained surges in your power bills from clogged filters
  • Higher moisture levels in your home
  • Puddles around your AC
  • Visible signs of mold growth around vents or other components

Difference Between Musty Odors and Burning or Chemical Smells

Musty smells are a sign that there is moisture somewhere inside your HVAC system. In comparison, burning odors indicate electrical issues. Meanwhile, chemical smells may be a sign of a refrigerant leak. If you smell burning or chemical odors, you should immediately call for HVAC help to avoid potential fire and chemical hazards.

When Mold Inspection and HVAC Services May Be Necessary

If you can replace your air filter or perform other maintenance to resolve the mold problem, you likely don’t need professional help. Unresolved mold odors should always be inspected by a professional. Our experienced HVAC technicians can check out your system and help diagnose the underlying cause. Then, we can recommend the best way to repair the issue and improve your home’s air quality.

Why the House Smells Musty Only When the AC Runs

There are a few reasons why you may only notice the musty odor when your AC is running.

Moisture Buildup That Gets Pushed Through the Ductwork

If the moisture buildup and mold are in your ductwork, evaporator coils, or other components, the scent doesn’t really enter your home until your HVAC system turns on. Once there is airflow going through your AC, the smell gets blown through your ductwork and into each room.

How Humidity and Poor Airflow Make the Problem Worse

Switching off your AC won’t make the musty odor better. The AC is responsible for managing your indoor humidity and circulating the air. If humidity levels rise and airflow declines, the problem will become worse.

Why the Smell May Fade but Still Indicate a Real Issue

During the initial few minutes that your AC runs, you’ll likely notice the smell more. While the odor may fade over time, this doesn’t actually mean the problem has disappeared. The only way to prevent the musty scent from coming back is by getting the issue fixed.

Is a Musty Air Conditioner Dangerous?

For Sacramento homes, a musty air conditioner isn’t a minor concern. From your personal health to your family’s comfort, a musty air conditioner can have a major impact on your quality of life.

Health Concerns for Allergy and Asthma Sufferers

When mold is blown into your home, it can immediately cause asthma attacks and allergy symptoms. This issue can be especially bad for children, elderly family members, and loved ones who have weakened immune systems.

When You Should Stop Running the System and Call for Service

If the smell doesn’t go away after you have run your system for a few hours, you should stop running it and call for AC repairs. You should also get help if you notice water leaks, poor airflow, visible mold, or any health-related problems.

How HVAC Odor Removal Works

Once you reach out to our team, we can help in a few key ways.

Inspecting Drain Lines, Coils, and Pans

First, we’ll locate the source of the smell. One of our HVAC technicians will carefully inspect your drain lines, coils, and drain pans for signs of mold growth and moisture.

Cleaning the System Safely

Once we’ve found the problem, we’ll safely clean the system.

Checking for Mold, Duct Contamination, or Airflow Issues

To prevent future issues, we will inspect your AC for mold and airflow problems. We will also see if your ducts need to be cleaned to remove the mold and mildew contamination.

Fixing the Moisture Source

Our team will fix the cause of your moisture, so you don’t experience the same problem in the future.

Can You Fix a Musty Smell Yourself?

Whether you can fix this problem depends on the cause. While there are basic steps you can use on your own, more complicated problems will require professional help.

Safe First Steps Homeowners Can Try

To troubleshoot airflow issues, start by replacing your air filter. Normally, this should be done every 30 to 90 days. 

Afterward, try cleaning your condensate drain line. You can pour a cup of vinegar down the line to remove blockages and reduce mildew buildup. If there is any debris in the line, you can use a wet/dry vac to clean it.

When DIY Efforts Can Make the Problem Worse

If these steps do not help, it’s time to call a professional. Because of the delicate components involved, you should let one of our HVAC technicians handle your evaporator coil cleaning and ducts. When a smell doesn’t go away after basic troubleshooting, it’s a sign that you need professional help.

How To Prevent Musty Smells From Returning

To avoid future problems, remember to perform the following maintenance steps.

Routine AC Maintenance

A springtime tune-up is a good opportunity to detect and resolve HVAC problems before they worsen.

Filter Changes and Airflow Improvements

Consistent filter changes help you maintain airflow and prevent your evaporator coils from becoming dirty.

Drain Line Cleaning and Moisture Control

Regularly cleaning your drain line can help you avoid blockages and mold growth. To prevent moisture buildup in your home, you should also remember to run your kitchen and bathroom exhaust fans whenever you cook or bathe.

When Indoor Humidity Control May Help

If your home has consistently high humidity levels, you may need to invest in a whole-home dehumidifier.

When To Call for AC Odor or Mold Inspection in Sacramento

You should reach out for a professional mold inspection if you notice any of the following symptoms.

  • The smell keeps coming back. 
  • There are visible signs of mold or water leaks.
  • Besides the smell, your home is also experiencing weak airflow and poor cooling performance.

How Fox Family HVAC Can Diagnose the Source

At Fox Family, our technicians have years of experience diagnosing moisture and airflow problems. We’ll test your system’s performance and inspect for faulty components. By repairing the source of your problem, we can prevent musty air from returning.

Learn more about how we can help by reaching out to our team today.

FAQs About Musty AC Smells

Why does my air conditioner smell like mildew?

Mildew odors are a sign that there is excess moisture. Often, this is due to an issue with your drain line, drain pan, or evaporator coils.

Can dirty coils cause a musty smell?

Absolutely. Dirty coils are more likely to freeze, which leads to excess moisture around the coils. Eventually, this can cause mold to grow.

Should I worry about mold if my vents smell musty?

Yes, musty odors are a sign you need AC maintenance and repairs. Our team can help you diagnose the underlying problem that is causing the musty smell.

How quickly should I get HVAC odor removal service?

Because of how much these odors can impact your health, it’s a good idea to schedule an inspection right away.

Improve Indoor Air Quality

Should You Get Indoor Air Quality Testing Before Buying an Air Purifier?

Ionic air purifiers, HEPA filters, and activated carbon filters are just a few of the methods you can use to purify your home’s air. Many homeowners make the mistake of getting an air purifier before they actually test their air and find out the type they need. Before you invest in a whole-home system, it pays to schedule an indoor air quality (IAQ) test first.

Why Indoor Air Quality Testing Comes Before an Air Purifier Installation

In Sacramento, air pollution can come from vehicles, agriculture, wildfires, and wood burning. Where you live, your current system, and the type of pollutant can greatly impact the air purifier system you need.

Why Symptoms Alone Do Not Tell You the Full Story

Excess dust, pollen, wildfire smoke, and other airborne contaminants can harm your family’s health. Even if you experience respiratory symptoms, they won’t tell you what the cause is.

What Testing Can Reveal That Filters and Purifiers Cannot

Air purifiers only clean the air. They can’t tell you what is actually in it. An IAQ test reveals the levels of many different compounds.

  • Volatile organic compounds (VOCs)
  • Carbon monoxide
  • Carbon dioxide 
  • Smoke
  • Dust
  • Mold
  • Harmful chemicals

How Testing Helps You Avoid Buying the Wrong System

Once you know what type of contaminant is in your air, you can determine the right system. For example, check out some of the most common IAQ systems and what they work best for.

  • Mechanical Filters: Mechanical filters, like HEPA filters, are incredibly effective for dust, pollen, and mold spores. They can filter smaller contaminants as well, including bacteria and viruses.
  • Activated Carbon Filters: This type of filter is especially good at removing gases, VOCs, and chemicals from the air.
  • Ionizers: These are good at binding to dust, smoke, and pollen. However, it’s important to note that they can produce ozone, which can cause respiratory issues.
  • UV Air Purifiers: These purifiers work best for bacteria and viruses.

What Indoor Air Quality Testing Looks For

When we test a home’s air quality, we’re looking for a few main types of contaminants.

Airborne Particles Such as Dust, Pollen, and Dander

Dust, pollen, and pet dander can negatively impact your allergies. In Sacramento, the worst pollen levels tend to occur between March and May or June.

Humidity Imbalances and Moisture-Related Risks

If your home’s relative humidity (RH) gets above 60%, the chances of mold growth increase significantly. In general, you want your RH to be around 30% to 60%.

VOCs and Household Chemical Pollutants

Building materials, furniture, paint, and other household items can release harmful chemicals into the air. This is especially common with new houses and recent renovations, which is why we test for it.

Ventilation Issues and Airflow Problems

When your home has stale air, pollutants can quickly build up. This is one of the reasons why indoor air can be 2 to 5 times more polluted than outdoor air.

Possible Mold-Related Concerns

Mold is harmful to your respiratory health, so our team will test your home for mold before you select an air purification system.

Signs You Should Schedule Indoor Air Quality Testing

If you experience any of the following symptoms, it’s time to get your IAQ tested.

  • Allergy and asthma symptoms when you’re at home
  • Persistent odors that don’t go away
  • Visible dust that keeps returning
  • Stale air
  • Recent remodeling or new furnishings, which can release chemicals and VOCs
  • Mold odors
  • Pet-related air quality issues
  • Wildfire smoke 

Can an HVAC Air Purifier Solve Every Indoor Air Problem?

While heating, ventilation, and air conditioning (HVAC) purifiers can be extremely good at cleaning, even the best purifiers won’t solve every indoor air problem.

What HVAC Air Purifiers Do Well

HVAC filters are especially good at reducing pollen, dust, and pet dander. At high MERV ratings, they are also great for filtering viruses and bacteria.

What They Do Not Solve on Their Own

HVAC purifiers have many advantages, but they aren’t particularly effective with gases. They are also unable to replace stale air or affect your humidity levels. 

Why Do Some Homes Need Filtration, Humidity Control, and Ventilation Together?

Some local homes require a combined approach because they need to address multiple problems. While filtration helps with allergens and germs, humidity control is necessary to manage your home’s humidity. Ventilation systems are necessary if you want to release stale, polluted air and bring fresh air inside.

What Is the Best Air Purifier for an HVAC System?

If you’re looking for an air purifier, there are many options available for you to choose from.

Whole-House Air Purifier HVAC Options Explained

Whole-house air purifiers are incredibly effective because they are connected to your HVAC system. All of the air that goes into your ductwork and vents is treated first.

Media Filters vs. UV Systems vs. Electronic Air Cleaners

There are also purifiers designed for specific purposes.

  • Media Filters: These are basically extra-thick filters that have a higher MERV rating, so they can remove more pollutants from the air.
  • UV Systems: While these systems are incapable of filtering the air, they can get rid of bacteria and viruses by using UV light to neutralize microorganisms in the airflow.
  • Electronic Air Cleaners: These units create an electric charge that traps dust and pollen particles. They are known for being significantly more effective than fiberglass filters.

How Home Size, Health Concerns, and HVAC Compatibility Affect the Choice

Your home size, health needs, and HVAC compatibility will determine the type of system you use. For example, many people use standalone units with ductless mini-splits. These factors will also determine the capacity you need, the filtration type, the filtration intensity level, and how the purifier is set up.

Whole-Home Air Purification vs. Portable Air Purifiers

On a basic level, homeowners will get to choose between whole-home and portable air purifiers.

Coverage and Convenience Differences

The biggest difference is in the coverage level and how they are set up. A whole-home purifier is connected to your HVAC system and cleans the air for your entire home. Portable purifiers only work for individual zones. 

Maintenance and Filter Replacement Considerations

A portable unit requires filter changes every few months, which can be tedious for homeowners. In comparison, whole-home air purifiers require professional maintenance. During your fall and spring tune-up appointments, our HVAC technicians will make sure your purifier is working properly.

Which Option Makes More Sense for Long-Term Results?

While portable units have a lower upfront cost, they are less effective than whole-home units. Over the long run, a whole-home air purifier is a better choice for your family’s health and long-term goals.

When Air Purifier Installation Makes Sense Right Away

Getting an air purifier installed right away makes sense in the following situations.

  • Your family members experience severe allergy symptoms.
  • There are heavy levels of dust in your home.
  • Your home is frequently exposed to wildfire smoke. 
  • A previous IAQ test indicated that there were filtration issues.
  • You have a lot of pet dander in your home.

When Testing First Is the Smarter Investment

In the following instances, we generally recommend holding off on installing a new purifier and getting an IAQ test first.

  • Mold, humidity, and ventilation problems are the major focus.
  • Your family members are experiencing symptoms without a clear source.
  • You are unable to decide which IAQ upgrade you need, and you want to test your air quality first.

How a Professional Recommends the Right Whole-Home Air Purification Solution

With a few simple steps, our team can recommend the best IAQ systems for your home.

Reviewing Test Results and HVAC System Design

First, we’ll test your home and analyze your results. We will also consider which systems will work with your existing HVAC design.

Matching Equipment to Your Specific Air Quality Issue

Our team will find the purifier that matches your main IAQ concerns. Then, we’ll determine the size and brand that matches your existing HVAC setup.

Avoiding One-Size-Fits-All Recommendations

Your home is unique. We will never recommend an air purifier until we’ve had a chance to test your home and review your existing equipment.

Indoor Air Quality Testing and Air Purifier Installation in Sacramento

IAQ tests and air purifiers are popular in Sacramento for a few major reasons.

Why Local Climate and Seasonal Conditions Matter

In our local area, we experience high levels of ozone, agricultural pollutants, and wildfire smoke. While smog is a major issue in spring and summer, inversions and wood burning are major IAQ concerns in the fall and winter. Meanwhile, humidity and mold are at their worst during Sacramento’s rainy season from November to February.

Common Indoor Air Quality Concerns in Sacramento-Area Homes

Sacramento homes often have to deal with a range of air quality problems.

  • Wildfire smoke
  • Pollen
  • Dander
  • Ozone particles
  • Mold
  • Humidity
  • VOCs

How Fox Family Heating & Air Can Help You Choose the Right Next Step

At Fox Family Heating & Air, we have years of experience working with local homeowners. We understand Sacramento’s unique climate, so we know which air purifiers work best. Schedule your IAQ test by reaching out to our team today.

FAQs About Indoor Air Quality Testing and Air Purifiers

Is indoor air quality testing worth it?

It’s absolutely worth it. If you’ve been experiencing allergies or respiratory issues, IAQ testing can help you figure out the underlying cause and take the first step toward solving the problem. 

Do I need testing before installing a whole-house air purifier?

We always recommend testing your air quality before you install a whole-house purifier. Each type of purifier targets different problems, so you need to figure out which contaminants are involved.

What is the best whole-house air purifier for HVAC systems?

In most homes, a media filter or HEPA filtration system will be an extremely effective option. These systems can help you remove most contaminants from the air, so your family can breathe easily.

How long does air purifier installation take?

We can generally install your new air purifier in just two to four hours.